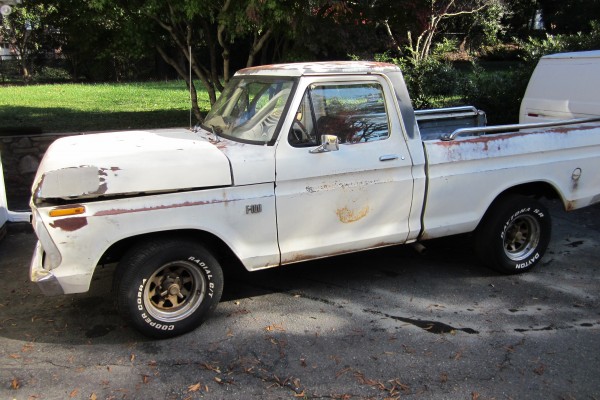
This past summer my father and I started digging through the classifieds for a truck, either a Chevy C-10 or Ford F100. We weren’t too picky about the body style, but we knew we wanted something with minimal trim, easy drivability and decent looks… at least kind of decent looks.
Our intentions were to build a project anyone can enjoy, drive, and not have to worry about if it’ll make it home or not. As ugly as it may be on the outside, we at least want to know it’s mechanically sound on the inside. And we don’t want to have to paint it either.
Luckily, we don’t mind patina.
Finding It
We toyed with the idea, but never really put money down until the Spring Charlotte Auto Fair in April (there’s also the fall show in September). The AutoFair is a great place to find parts, see some of the best show cars in the Southeast and snag project cars, those running and those not.
After seeing a slew of overpriced rusty pickups, we decided on this 1974 Ford F100. Since it’s a short bed (we don’t need it for hauling and its easier to get around than a long bed) custom cab, it has very little trim. It came equipped with a 360-cubic-inch FE engine, automatic transmission, power steering, and factory disc brakes. This meant it would be easy to drive, and it looked like we wouldn’t be spending the rest of our winter patching it up with new sheetmetal.
The owner started it up for us, and by the smell, we could tell right away the gas had gone bad and it would need a complete tune-up and possibly more. A good starter project like this usually sells for $800 to $1,200. We snagged it for $800, and the previous owner said he’d deliver it for another $100.
Now it was up to us to get it in good running condition.
Using our F100 as an example, here are a few things to consider when turning classic vehicle into a reliable driver.
The Long Road to Recovery
First on the list was a good cleaning and compression test. Here we weigh our options. If compression had been bad, we may have had to start over, but luckily compression was very good: 140-150 pounds on all eight cylinders. Note: Always check compression with the carburetor all the way open, choke off and ignition disabled.
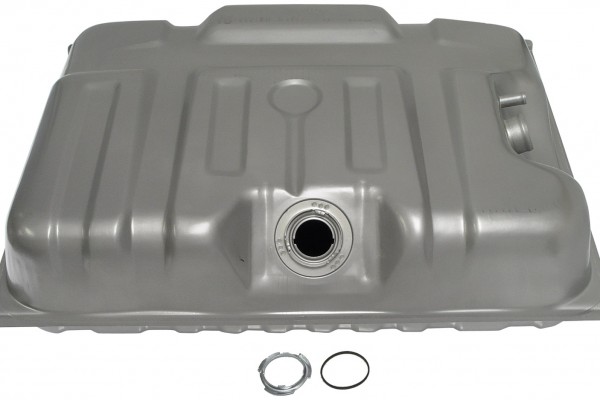
Now we just had to get rid of the dead gas. This meant dropping the fuel tank and cleaning it. Any time a vehicle has been sitting around for a long time or you can detect bad gas, you should always remove the fuel tank for cleaning and inspection. After dropping the fuel tank, we found it was beyond cleaning (boiling out) and the sending unit was also bad. If you work on projects like ours you know how hard it is to get quality parts and technical advice locally, but we’ve always found that Summit Racing has what we need. Summit Racing offers new Dorman brand fuel tanks that are quality products. We got one plus a new sending unit.
The mechanical fuel pump was in good shape. We removed it, cleaned it, and inspected the arm, which often shows signs of wear for high mileage engines. We bolted it back on with a fresh gasket and replaced the rubber hose forward of the metal fuel line, in the engine bay.
It appeared the carburetor may have been rebuilt once before, and we determined it needed to be replaced altogether. Weigh your options here. We made the mistake of buying a rebuild kit from the local auto parts store for around $40, and it didn’t have nearly enough replacement parts. A used swap meet or Craigslist carb is often not any better than what you already have, and we’ve also had bad luck in the past with rebuilt carbs from the local auto parts store.
It was one the most expensive single parts for the pickup thus far, but since we’re going for reliability, a new carb was a worthy investment. Being this is not a restoration and drivability is most important, we decided to go for a performance carburetor in lieu of a stock replacement. We figured a 500 cfm carburetor would be right, but our Summit Racing tech rep suggested a 350 cfm carb. That is closer to the factory carburetor size and since the engine is bone stock, this will give us the best drivability. We went with a Holley Model 2300 two-barrel.
With fuel delivery in good shape via the Holley carburetor, we turned our attention to spark. At some point, the distributor had been replaced but still used old-school points. It also had a bad vacuum advance. Summit Racing offers Ready-to-Run Billet Distributors that are reliable and can be adjusted to fine tune advance curves—well worth the money versus rehabbing the old distributor. Ignition coils should also be replaced whenever you update distributors. Our ignition coil appeared to be original, so we replaced it with a Summit Racing 40,000 volt coil.
Tuneup
We replaced the old cruddy spark plugs with Autolite Double Platinum plugs and swapped out the old wires for a set of Summit Racing 8.5mm universal ignition wires. We also fixed a couple of oil leaks and replaced the belts, hoses, and the PCV valve. We know from experience that a reusable K&N air filter will compliment everything we have done so far, so we added one of those as well.
Our truck now runs better than when it was new thanks to the performance carb, modern ignition, and a quick tuneup.
Parts List
RNB-576-116: Dorman Fuel Tank
RNB-692-155: Dorman Fuel Sending Unit
HLY-0-7448: Holley Model 2300 Carburetor, 350 cfm
SUM-850309-1: Summit Racing Ready-to-Run Billet Distributor
SUM-G-5217: Summit Racing Ignition Coil
ATL-APP45: Autolite Double Platinum Spark Plugs, set of 8
SUM-881002: Summit Racing 8.5mm Ignition Wires
SMP-V156: Standard Motor PCV Valve
KNN-E-1570: K&N Air Filter


Jesse, Is the 350cfm carb doing the job? I think the 500 cfm would have been a better choice. As I have always had good luck with the formula cubic inches x desired rpm divided by 3456 equals size of carb in cfm.
I have an 87 c-10 26k original.replaced factory fuel injection with holly 650 cfm replacement unit.performance is unbelievable.probably going to do some ignition upgrades.good luck with the f 100
Need more pictures
So what was the rough ball park cost of all the new parts and any idea as to hours of labor?