
Elbow grease. It’s valuable stuff.
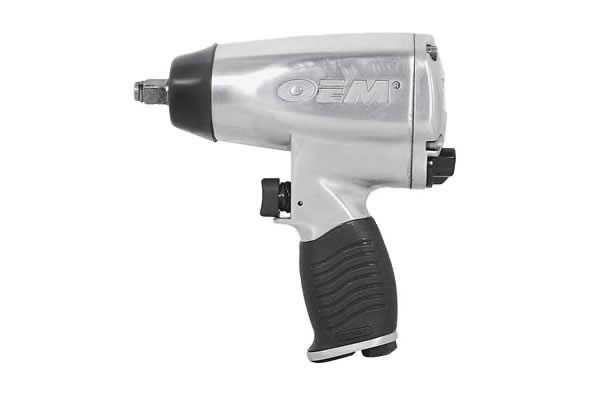
That’s why professional mechanics and serious auto enthusiasts love their air tools; one squeeze of the trigger blows away all of the drill-it-/hammer-it-/shear-it-/sand-it-yourself muscle you can muster. Plus, there’s no better way to feel like a full-fledged NASCAR mechanic than with a few blasts of an air-powered impact wrench.
Decking out your workspace with an air compressor system is a great way to take your projects to the next level and an absolute necessity when it comes to jobs like media blasting and paintwork. So how do you create the ultimate shop assistant out of thin air? The first thing you’ll need is the right compressor.
Pick a Compressor
Not all compressors are created equal. There are five key attributes you should consider when selecting a compressor:
Cubic Feet per Minute (cfm): The most important factor in selecting a compressor, cfm is the volume of air a compressor is able to push. All air tools have a cfm rating, and your compressor’s output must exceed this number for your tools to function properly.
For example, our Summit Racing Pro Impact Wrench requires 5.1 cfm. A compressor like this 9.0 cfm unit from Campbell Hausfeld will provide more than enough air to get the job done. However, tools with a bigger appetite for air, like an 11.4 cfm Hutchins Orbital Action Sander require a more powerful compressor to keep up. Campbell Hausfeld’s 14.4 cfm compressor will do the trick.
Simply put, always select a compressor with a cfm rating greater than that of your “hungriest” air tool.
Pounds per Square Inch: This is the pressure at which the air is delivered from the compressor. Just like air volume, air tools require a certain minimum pressure to operate properly.
The majority of tools require 90 psi. While most air compressors produce more maximum pressure than that, you want to check the compressor’s cfm output at 90 psi. This is a better indicator of whether a compressor can handle the air tools you want to use.
The greater pressure your compressor produces, the wider range of potential tools you’ll have at your disposal.
Horsepower: Used to measure the output of your compressor’s motor, but cfm and psi are much more accurate measures of your compressor’s effectiveness. Generally, cfm and psi increase as horsepower increases.
Tank Volume: The amount of air your compressor can hold in reserve, usually measured in gallons. A larger capacity tank will lessen the load on the motor, since it won’t have to cycle as often to replace the air you’ve used—a big advantage if you’re keeping the compressor in your workspace, since even electric units can be noisy neighbors.
Duty Cycle: The amount of time a compressor motor can safely operate before it shuts down to cool off. For example, a compressor with a 50-percent duty cycle will run for half of a given time period before shutting down.
Compressors with short duty cycles can pose a problem for continuous-use air tools like grinders and sanders, so be sure to get a compressor with a large tank, big motor, and a duty cycle rating of 50 percent or more if you plan to use these sorts of tools.
Check out Summit Racing’s full selection of shop compressors. After you pick out your compressor, you’re ready to plumb your workspace.
Plumb it Up
Once your compressor is in place, you might be tempted to throw on an air hose with a quick-disconnect fitting and call it “mission accomplished.” But a good plumbing job is every bit as important as picking the right compressor.
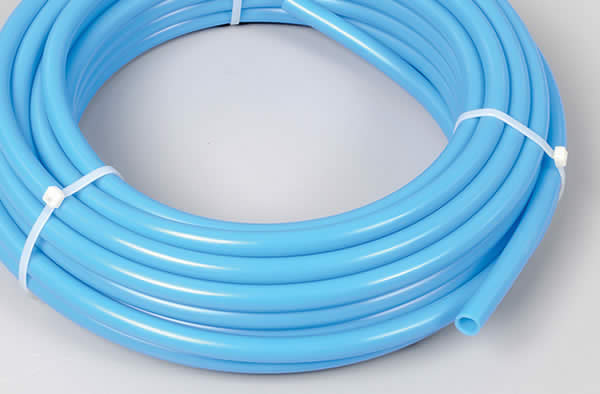
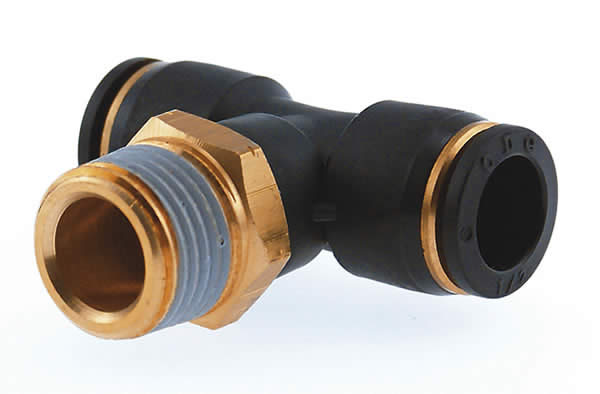
Since everyone’s work space and air requirements are unique, there’s no 100-percent foolproof plumbing setup out there, but the basics remain the same—and our own Summit Racing Push to Connect Air Hose and Fitting Combo is a great place to begin. The kit comes with 50 feet of flexible and tough ½-inch o.d. Puvex hose and plenty of elbows, straight unions, and tee fittings to get you started.
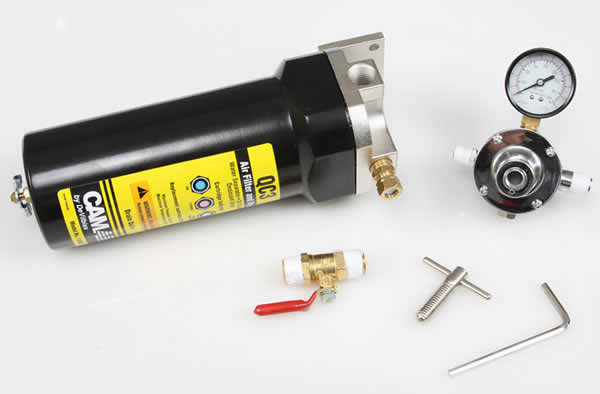
When laying out your setup, start with a short length of hose followed immediately by a filter/dryer. Why? Because air compressors also pass along small amounts of condensation and oil, and that’ll damage your air tools, clump blasting media, and absolutely ruin a paint job. The DeVilbiss QC3 desiccant dryer is the perfect solution—it even comes with a regulator, pressure gauge, and shut-off valve; more setup necessities.
If you’re making upgrades to an existing system with hard lines (copper, galvanized steel, etc.), consider adding a second filter as close to the air outlet (or outlets) as possible. This way, any corrosion, oil, or debris hidden in the pipes will be caught before it reaches your tools.
A properly maintained dryer will catch the majority of moisture in your system, but a small amount can still get through, which makes adding drain valves a must. Plumb in a drain at every drop leg in your plumbing setup, otherwise gathering condensation will inevitably reach your tools. For you forgetful types, a DeVilbiss CAMAIR Automatic Drain makes keeping your lines moisture-free a cinch.
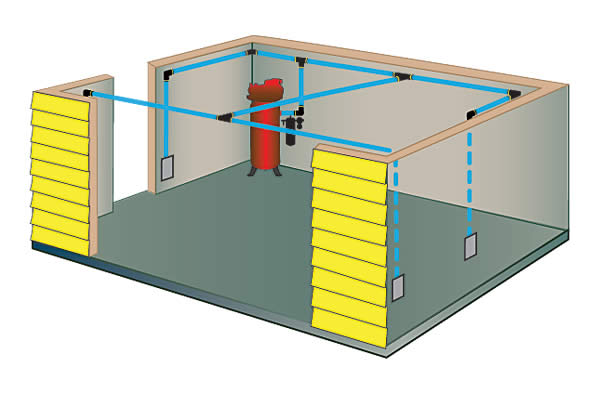
With your air dry, the last step is getting the air where you need it to go. Using Summit Racing Puvex Air Hose, running your lines is easy. It’s flexible, abrasion resistant, and works perfectly with our Push to Connect Fittings.
The real trick is to plan ahead. If you see a blasting cabinet in your future, add a tee fitting and a shutoff valve along the wall where you’d like it to go. For convenience—especially if you’re going to be painting—plumb a Performance Tool Retractable Air Hose Reel from the ceiling—that’s a handy way to avoid draping hoses over your vehicle. For safety, be sure to add a shutoff valve near any point of operation.
That’s all there is to it! With a little planning, a basic air compressor setup will breathe new life into just about any project around the garage. Before you start plumbing your own system, check out our huge selection of air tools. No matter what your next project is, you’ll work harder without all the hard work!


I bought at Lows their 80 gal. 4cyl air compressor makes big noise and lots of air for my air tools sand blaster painting blowing out my shop drive way you Mame it.And I love it.
At present that you have got particular a powerful ticket compressor for your requirements in performing your current ticket programs and here you desire to grow the nation’s strength so that you could have a very good decent product designed for a bit longer. If you happen to genuinely wish to understand how to you want to keep ticket compressor uploaded and functioning clearly, then simply this particular blog post may be for one. As with various other foot orthotics programs, a wonderful to accommodate day by day protection. Yet, you have to do ordinary protection to help you broaden all the memories from your ticket compressor.
Thanks so much for that excellent advice, maybe someone out there will even have a clue what the hell you’re talking about!
All main distribution lines should slope slightly to a down pipe with a drain port.
All down pipes should go up off the distribution line and then down to the quick disconnect.
The quick disconnect should be on a tee’d line where the down line goes past the quick disconnect and have a drain valve on it.
All lines should be routed so condensation has someplace to go, be collected, and be expelled…rather than go through the quick disconnects.
Other places to play video games are on mobiles,
PDAs, graphing calculators, GPS receivers, MP3 players, cameras and watches however these don’t have nearly the same experience and dimension as the earlier mentioned platforms.
Reviews are your best strategy to determine the excellent Netflix movies that you will want to watch.
You can either choose a website that allows you
to watch the episodes totally free or access a paid software in order to transform your own PC in to a fully functioning television.
Notify your insurance company that there has been a sewage spill in your home;
Is PVC suitable for air lines?
Yes. Mine are PVC and still going strong since 1990.
Acknowledges for paper such a beneficial composition, I stumbled beside your blog besides decipher a limited announce. I want your technique of inscription 12 Volt DC Air Compressor
I should assert barely that its astounding best air compressor for tires The blog is informational also always fabricate amazing entitys.
Thank you very much for the article, very useful. Our customers often ask us about such additions for their garages, where it can be ordered. From now on, we will show them your site so that they are convinced that this can be done on their own. Tell me, do I need any special tools that not everyone has in the house to make the same with my own garage?
[…] How to Install an Air Compressor in Your Garage | http://www.onallcylinder… […]