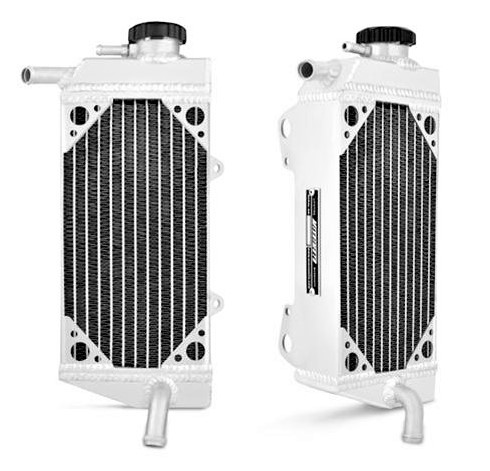
For optimum engine performance and longevity, it’s imperative that you maintain the health of your dirt bike’s cooling system.
Mostly, that means maintaining your radiator and constantly checking your fluid levels.
Build in the time it takes to do proper maintenance checks before you go riding.

Check the Exterior
Radiators on a dirt bike are located in a pretty vulnerable position—just behind your front wheel. That’s where a lot of the rocks and sticks hit when you’re riding, and that can puncture radiators and cause leaks. You should check out your radiator’s condition after each ride. You want to make sure no mud or debris is blocking air flow, and you want to be on the lookout for any damage to your hoses.
Also, keep your eye out for any leaking coolant under your dirt bike—which is often an indication your bike’s water pump seals are worn.
Check Fluids
Let’s get a couple basic safety things out of the way first:
1. Never uncap your radiator if it’s hot. As a general rule, you risk dangerously hot liquid spraying onto you anytime your engine or radiator isn’t cool enough to touch.
2. Never leave an open container of radiator fluid laying around where animals or children can get to it. Dogs have a nasty habit of drinking antifreeze if it’s within reach. Generally, that ends very badly.
A dirt bike’s cooling system should be flushed and have the fluids replaced annually. Before draining your cooling system, it’s a good idea to add four ounces of aluminum radiator flushing fluid and run your engine for about 10 minutes before draining the system.
Do your homework regarding what is or is not allowed in your state when disposing of old coolant. EPA regulations vary from state to state, and some are rather strict. A local automotive garage is likely to be able to help you or point you in the right direction. There are nontoxic, completely biodegradable coolants out there, though on a case-by-case basis, you may compromise performance a little using them. You can also find places to recycle antifreeze here.
Next, remove your water pump cover to inspect for dirt or corrosion. Check your water pump bearings by grabbing your water impeller and trying to move it up and down. If there is movement, it’s time to replace your pump bearings, seals, and possibly the water pump shaft, which can get cut by worn seals and bearings. Another sign you need to replace them is if you notice oil leaking into your water pump housing.
If you have to replace some of your water pump components, we recommend replacing all of them. It’s a relatively inexpensive fix.
Bleeding and Refilling
First and foremost, if you’re switching coolants from one brand or type to another, please flush your system with distilled water before the switch.
For dirt bikes with bolts on top of the cylinder head or water spigot, it’s important to remember to bleed the excess air from the system. Air pockets can prevent coolant from circulating and will cause engine temperatures to rise until blowing off your radiator cap.
To bleed to trapped air properly, fill your system with coolant to the top of the radiator. Don’t replace the cap. Loosen the bolt until some coolant comes out then tighten the bolt. After that, top off the coolant in your radiator, replace the cap, and run your bike’s engine for 10 minutes.
Make sure you check your coolant levels one more time after that, always keeping in mind you should never pop the radiator cap while the engine’s still hot.
Again, you should only have to flush and replace your cooling system once a year. Regularly checking your fluid levels and maintaining your dirt bike will save you money and time over the life of owning it.

[…] engine could be in danger of overheating. Before you head out for a day on the dunes, check the coolant level in the engine to make sure that you won’t be stranded somewhere. High temperatures will shorten the life of […]
[…] 1: Remove all of the bolts from the cooling system. This process can be very messy, so make sure that you wear protective gloves during this step. […]