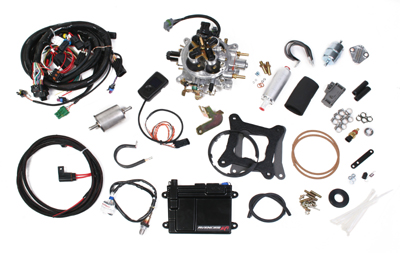
Upgrading your early muscle car’s carburetor for a modern electronic fuel injection system has never been easier and less expensive. In the past, most EFI systems required some knowledge of how to set and adjust fuel and ignition tables from a laptop computer. But new EFI systems like Holley’s Avenger kit, makes it much simpler.
These types of EFI systems utilize a throttle body injection system that easily bolts to your vehicle’s existing square-bore, intake manifold. EFI units like the Holley Avenger, are available for various applications from 275 to 600 horsepower and with cfm ratings from 600 to 900 cfm. So there’s a system available that can work on anything from a stock small-block, to a street-performance supercharged big block.
Depending on the make, model and year of the vehicle, differences in how the unit is wired and the routing of the fuel system may vary. But the basic procedure to install an EFI system like this, is essentially the same.
Step 1 – Make A Fuel Return Line
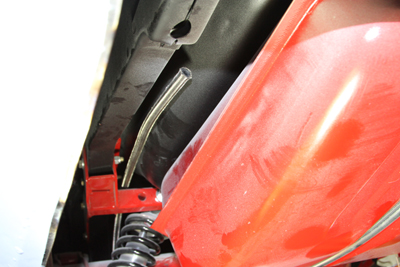
You’ll need to create a fuel return line from the engine, back to the vehicle’s fuel tank. This ensures the entire fuel system won’t go into vapor-lock and that it properly maintains consistent fuel pressure flow to the throttle body. You can use a -8 fuel line, like Earls’ AutoFlex stainless steel braided hose, to connect to the outlet of the throttle body and route back into the fuel tank. You can use the hose all the way back to the tank, or bend a steel line to run along the frame, then use the hose connection at the engine compartment and at the tank.
Many early-model OEM fuel tanks may not have provision for a return line. But you can simply purchase a return line adapter that fits between the rubber filler neck of the tank.
Step 2 – Bolt-in A High-Pressure In-line Fuel Pump
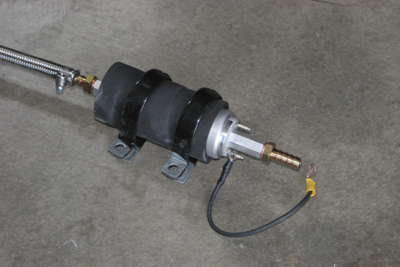
A high-pressure in-line fuel pump is included with EFI kits like the Holley Avenger. Find a suitable location away from the exhaust, preferably along the frame, and mount the pump using the isolator clamps provided in the kit. A fuel filter is also included. For most street applications a -8 hose is used to connect the fuel pump and filter. You can also use a steel hard fuel-line along the frame and use the -8 hose at the pump. The Holley Avenger system comes with stainless steel hose clamps that make routing your fuel line easy.
Step 3 – Swap The Carburetor For A Throttle Body
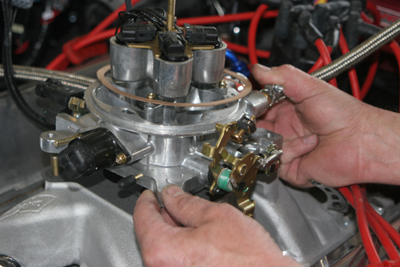
Adding the throttle body to the engine is the easiest part of this entire operation. Remove the throttle linkage and fuel line from the carburetor. Remove the four nuts that secure the carburetor the manifold and any gasket material that may be present.
Using the new gasket provided in the kit, bolt the Holley throttle body onto the intake manifold. Attach the fuel inlet hose to the rear of the throttle body, which already has a pre-adjusted fuel pressure regulator. Then simply attach the fuel return line to the outlet fuel nipple on the throttle body.
Reattach the throttle linkage, making sure to compensate for minor differences in the length. You want to be sure that the linkage allows the throttle body’s blades to remain closed and that they open all the way vertically at wide-open throttle.
Step 4 – EFI Sensor Installation and Wiring
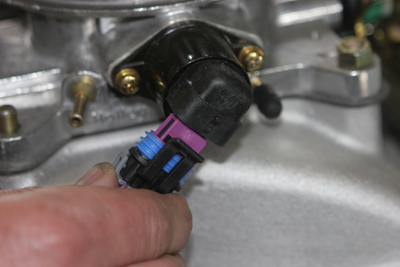
There are a few sensors that the fuel injection system relies on to ensure it can deliver the proper amount of fuel in various conditions. The Holley Avenger kit utilizes a manifold absolute pressure sensor, idle air temperature sensor, and a throttle position sensor. These will attach to the throttle body and simply plug into place and connect to the provided wiring harness.
To connect the oxygen sensor, you’ll need to drill a hole in your exhaust system and weld a steel, threaded bung to screw in the sensor. The instructions will tell you the best location along the exhaust to make this modification.
The system also comes with a water temperature sensor that can be installed into the intake manifold. Most, like this Weiand dual-plane intake, already has a threaded hole typically used for the water temperature sending unit. Once all the sensors are installed, the electronic control unit needs to be routed and plugged into the harness.
Step 5 – Add The Brains Of This Operation
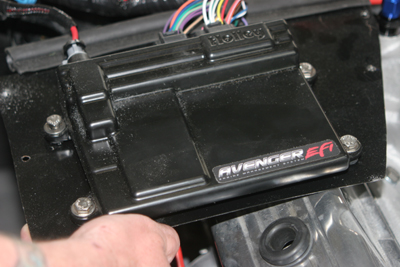
Holley’s self-learning ECU operates the entire system, and should be mounted in a location away from heat. This can vary depending on your vehicle and any accessories you have on it. The safest place is in or near the interior glove box.
No matter where you decide to mount your ECU, go through a trial fitting first, to ensure you have enough slack in the wiring harness.
The wiring harness also has separate power leads to operate the hand-held tuner and the fuel pump relay. You can take a 12-volt key-on ignition source from your vehicle’s fuse box and attach another lead directly to the battery. A system like this one also has provisions to use with various types of ignition sources. The Holley unit uses an ignition trigger for the injectors. So it’s wise to read the instructions carefully to see all of the scenarios available and wire the trigger lead according to which type of ignition system the vehicle is using.
Once everything is wired and the ignition switch is turned to the on position, the Holley Avenger LCD display on the hand-held turner comes on. This small tuner goes through a very simple menu that allows you to select options that inform the system of your vehicle’s engine size, approximate horsepower, transmission, and other basic variables of your application. Once that process is complete, the engine should start and the Holley ECU will automatically fine-tune for the proper fuel and ignition timing.
It typically takes six to eight hours to swap a carburetor for an EFI system like Holley’s. No laptop or additional dyno tuning is necessary. The Avenger EFI system is simple to install, and can really make a difference in improving your vehicle’s power and fuel economy.

Comments