Banging gears with a manual transmission is fun—if your clutch is up to the abuse, that is. When it’s time to replace or upgrade your clutch, these two dozen tried and true clutch, pressure plate, and flywheel tech tips and tricks will come in mighty handy. Here’s the collection:
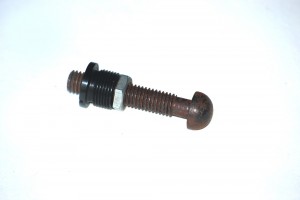 Play Ball
If your car came equipped with a diaphragm type clutch and you want to switch to a Borg & Beck or Long clutch, you’re going to find that some bits and pieces of linkage won’t line up, particularly the clutch fork pivot ball. You’ll have the same problem if you are swapping an OEM cast aluminum bellhousing for a scattershield (the block protector plate can skew the dimensions). In both cases, the clutch fork will hit the pressure plate cover. An adjustable clutch pivot ball will solve the problem. It lets you set the clutch fork to the proper height and geometry.
Bolts of Steel
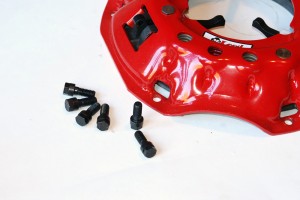 When installing a new clutch assembly, it’s always a good idea to use new high-strength fasteners for the pressure plate. Do not use lock washers or flat washers on the pressure plate cover—use the fasteners provided or recommended by the clutch manufacturer. In some cases, a good thread locker such as Loctite may be required.
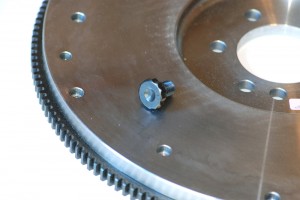 Bolt Torque
Generally speaking, flywheel bolts are torqued to 60-70 foot-pounds—not much for a bolt that has to endure the stresses of a modified powerplant. When you install a new clutch, consider ARP flywheel bolts. They are stronger than OEM-spec bolts and are designed to be torqued to 115 foot-pounds. Install them with engine oil as a lubricant. Even if the flywheel hasn’t been removed from your engine during a clutch swap, re-torquing the mounting bolts in a criss-cross pattern (to factory specs) is a good idea.
Squeaky Clean
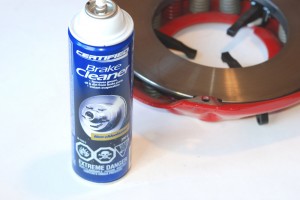
Always thoroughly clean the flywheel and pressure plate disc surfaces with a non-petroleum-based solvent—brake cleaner works perfectly—then dry them with compressed air. Wiping cloths and rags leave behind lint that will contaminate the parts and affect clutch performance. Make sure to thoroughly clean the bellhousing and the back of the engine block before clutch installation. Brake cleaner works best here too.
Lube Job
Here’s another clutch reassembly tip: lightly coat the input shaft splines, clutch hub, and release bearing hub and face with high-temperature grease. This ensures smooth operation.
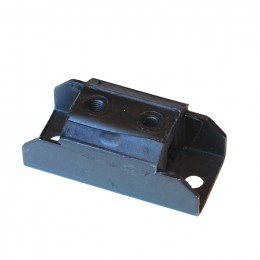 The Right Mount
While the transmission is out for a clutch job, carefully inspect the transmission mount. Rubber transmission mounts deteriorate over time and should be replaced regularly. Don’t even think about using a solid transmission mount on the street, either. The vibration will quickly damage your clutch and possibly the transmission. Use a rubber or polyurethane mount that will absorb most of that transmission-killing vibration.
 The Splines Align
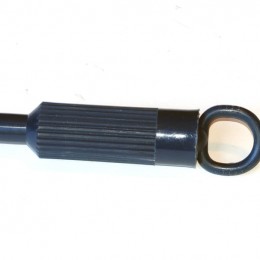
Clutch alignment can be a pain. You can make your own alignment tool from an old transmission input shaft, but Summit Racing offers clutch alignment tools that work much better. These tools are manufactured from high impact plastic or billet steel and feature a small snout that fits inside the pilot bearing. Some even have a handle on the other end. Most cost less than $20—a small price to pay for easy clutch alignment.
 Check That Flywheel
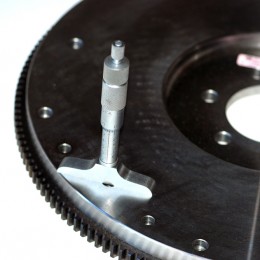
If you’ve had a flywheel resurfaced, be sure to check the mounting hole bore depth. If too much material was removed, there’s a chance the pressure plate mounting bolts may run out of thread. That means you won’t be able to properly tighten the pressure hardware. Double-check the flywheel before you install it.
 The Deburring Blues
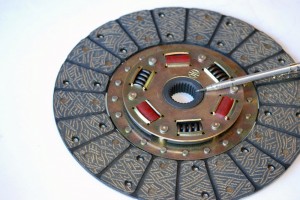
Have you ever come across a new clutch disc that doesn’t want to slide easily over the input splines on your transmission? The problem is sometimes caused by a burr on the gearbox input or on the clutch disc splines. Take a few minutes to carefully debur the splines on both the clutch disc and the input shaft. That will make installation much easier.
 The Flywheel Five
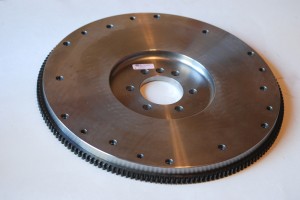
Follow these directions when installing a flywheel:
• Ensure the crankshaft flange is flat, square, and clean.
• Ensure the threads in the crankshaft flange are clean. Chase the threads with a tap if necessary.
• Clean any factory-applied rust preventative coating from the friction surface and mounting surface of the flywheel and the pressure plate.
• Use a thread locking compound on all flywheel-to-crankshaft and pressure plate-to-flywheel bolts. Loctite® Threadlocker #262 or equivalent is recommended by several clutch manufacturers.
• Never use an impact wrench on flywheel or pressure plate hardware! Use a torque wrench and follow the clutch manufacturer’s specifications.
Stubborn Bushing
Sometimes pilot bushings just fall out. Other times, they require a serious amount of persuasion to remove. If that’s the case, try this: get large diameter coarse screw (11/16-inch or larger, depending upon your bushing). Thread it into the soft pilot bushing material. Keep turning until the bolt strikes the back of the crank. That should force the bushing out. If it doesn’t, the screw will act as a long handle to work the bushing out of the crank.
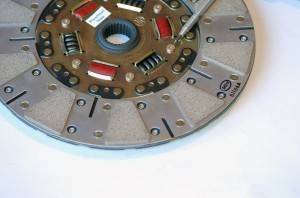 Busted Disc
There are two possible causes for the clutch disc hub breaking out. If the hub and the two plates are still riveted together, but the plate to which the disc facings are riveted is broken, there is a serious transmission misalignment. This can be caused by a cooked pilot bushing or trouble with the transmission input shaft. If the hub comes out and the two plates are not riveted together, then the clutch manufacturer did not correctly install the rivets.
Neutral Start
Make a habit of starting the car in neutral with the clutch disengaged. This technique places less strain on the crankshaft and extends its life.
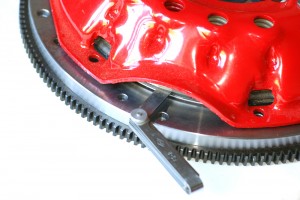 Clutch Gap
When adjusting the air gap on the clutch with a feeler gauge, push the pedal all the way to the floorboard or pedal stop. Next, slide a feeler gauge between the disc and the pressure plate. Turn the clutch adjustment rod until you have approximately a 0.050 inch air gap. When the air gap is set, release the pedal. The clutch is now properly adjusted.
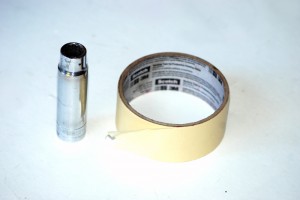 Emergency Alignment Tool
Don’t have a clutch alignment tool handy? Find a deep well socket that fits in the crankshaft pilot hole. Wrap the socket with tape until it contacts the splines. You now have an inexpensive emergency alignment tool.
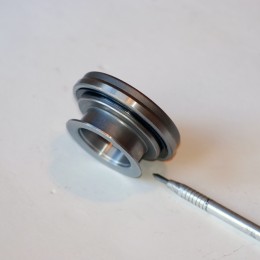 Bad Fork
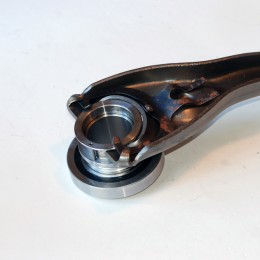
This photo shows the wrong way to install a throwout bearing in a GM clutch fork. The spring clip on the fork does not go on the outside or on top of the throwout bearing.
 Good Fork
This is how the throwout bearing should fit in the clutch fork. Both the spring clip and fork go on the inside channel of the throwout bearing.
 When Springs Go Wrong
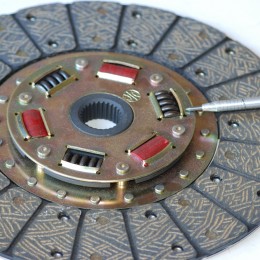
When you remove a clutch for maintenance, sometimes you’ll find the clutch disc hub springs are loose or missing. The hub springs normally become looser than they were when new. This doesn’t create a problem unless the spring starts to wear the drive plate or back plate of the disc. Some cheap clutch discs have springs that are so weak they’ll fall out, even though the facing material still looks perfectly fine. That’s why it pays to buy a quality clutch disc like this one from McLeod. Three of the hub springs are encapsulated in a urethane material, which provides a damping effect. This helps reduce clutch chatter.
The Howler
If your gearbox howls in neutral with the clutch out, try pushing in the clutch pedal. If the noise goes away, then the problem is a bum release bearing. Replace the bearing and things will be much quieter.
 Wrong Way Disc
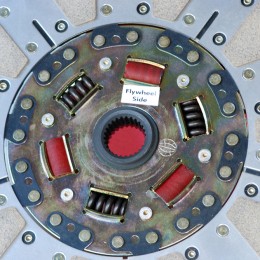
It is possible to install a clutch disc backwards. In most cases it will fit, but don’t expect it to live very long. New discs almost always have a decal indicating the side that faces the flywheel. If the disc doesn’t have a decal, install the disc with the hub assembly facing the transmission.
Please Release Me
If you have a Long-style clutch and it doesn’t release cleanly, the first thing to look at are the pivot stands on the pressure plate. Clean off all clutch debris and very lightly lube the pins and eccentric bushings with high temperature moly disulfide lube. Don’t use too much lube or it will ooze out onto the clutch disc.
Pivot Squawk
Hear a squawking noise coming from what seems to be the clutch, even when the clutch pedal is not engaged? Does the noise stop when a slight amount of pressure is applied to the pedal? You might think it is a bad release bearing. The more likely culprit is a dry clutch fork pivot ball stud, which results in metal-to-metal contact with the clutch fork. This can cause extreme wear and make the pivot ball go out of round. As a result, the fork will not rotate properly, causing release problems. That’s why you should always lightly lube the pivot ball surfaces.
Use the Pins
Some flywheels have dowel pins that help center the pressure plate. Don’t leave them out or you could end up with an unbalanced clutch because the pressure plate is not properly centered.
 X Marks the Spot
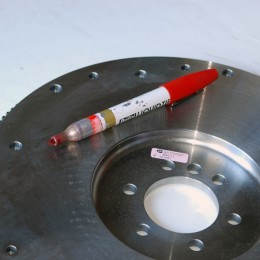
Always mark the location of the flywheel before you unbolt it. This ensures you can reinstall it in the exact same position. This is very important in applications where the engine is balanced with the flywheel. If you don’t index the flywheel correctly, the engine will no longer be properly balanced. The resulting vibration can cost you power and will certainly shorten engine life.

“Bolt Torque
Generally speaking, flywheel bolts are torqued to 60-70 foot-pounds—not much for a bolt that has to endure the stresses of a modified powerplant. When you install a new clutch, consider ARP flywheel bolts. They are stronger than OEM-spec bolts and are designed to be torqued to 115 foot-pounds. Install them with engine oil as a lubricant.”
If you increase the flywheel bolt torque on a vehicle with a one-piece rear main seal, you may distort the seal surface of the crankshaft. This is similar to distorting the cylinders of the engine by torquing the head bolts.
“Neutral Start
Make a habit of starting the car in neutral with the clutch disengaged. This technique places less strain on the crankshaft and extends its life.”
Do you mean “clutch ENGAGED”? If the clutch is DIS-engaged, the crank is being forced into the thrust bearing by the pressure plate.
“Bad Fork/Good Fork”
Needs to have the photos revised.
“The Howler
If your gearbox howls in neutral with the clutch out, try pushing in the clutch pedal. If the noise goes away, then the problem is a bum release bearing. Replace the bearing and things will be much quieter.”
Not definitive. Could also be the input bearing of the transmission.
To remove pilot bearing, pack it full of grease, put the correct alignment tool to it, whack it with a hammer….been doing that for decades, always has worked for me…
Do NOT do that on an LS based engine. They have a small plug in the end of the crank that you can dislodge and make a complete mess! Agree 100% that it works great for a typical SBC, BBC, etc.