Bestop Supertops offer the highest quality in function, fit, and style.

And oh yeah—they’re simple to install. Really simple.

We really like quick, easy tasks so we were pleasantly surprised at how easy it is to install a Bestop Supertop. Although Bestop’s well-written and complete installation instructions say to plan on three hours, you can likely cut that time in half or more if you’ve ever installed a soft top. In our case, since our Jeep CJ-7 had a Supertop on it before (the top had not been on the Jeep since we moved to Arizona from Colorado in 2003), it only took us an hour for this installation.

Bestop Supertops are considered by many to be the standard against which all other soft tops are measured. Supertops are available for Jeep model years 1955-2008, and the kits include hardware, soft top fabric, windows, and printed instructions. Some kits, like the one we used, also include two-piece soft doors which use the Jeep’s hard door strikers. An attachment system called Belt-Rail enables fast and easy installation, and a tailgate bar allows the CJ-7’s tailgate to open without having to open the rear window.

When we decided that we wanted a new top for our CJ-7, we initially looked for a white top due to the Arizona weather but found that white is no longer a favorite choice. Color choices are almost as varied as color choices were for Ford’s Model T in the 1920s—“any color you want as long as it’s black.” Depending on the model of soft top), you may also choose from charcoal and spice (our choice).

We waited until late spring for our Bestop installation so daytime temperatures would be consistently above 72 degrees F. This allowed us to lay the cloth portions of the top out in the warm sun while we were installing the hardware. By doing so, our cloth top was more pliable, making it easier to install the top and ensuring a nice, tight fit.

As we said before, the installation process was quick and simple—as you can see in the slide show below:

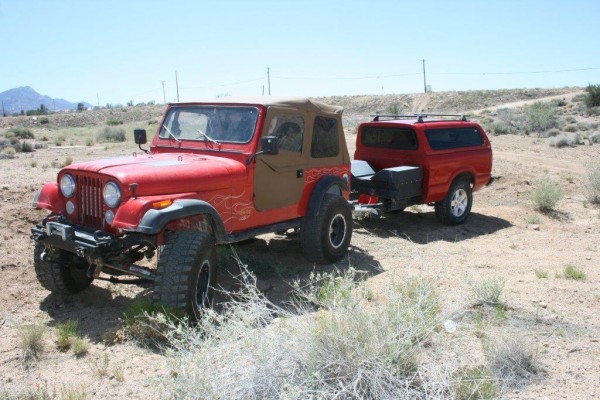
jeep cj-7 pulling a trailer on a desert trail
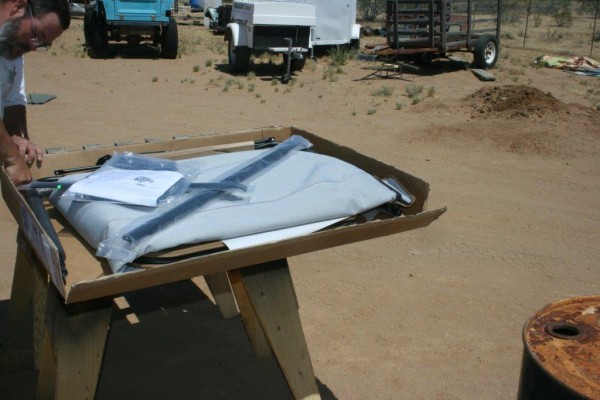
jeep cj-7 soft top, new in box prior to install
man reading a jeep cj-7 soft top installation manual
measuring windshield top to tub corner for soft top on a jeep cj-7
soft top mount on the windshield of an old jeep cj
close up of an old windshield soft top rail on a jeep cj
man installing jeep cj soft top tub rail
close up of a jeep soft top frame mount bracket
foam covers on a jeep cj soft top frame bows
snaps on a jeep cj soft top head rail
zipping down the corner of a window on a jeep cj soft top
zipping together a window in a jeep cj soft top
installing a jeep cj soft door handle
Detail shot of door handle bolt inside a jeep cj soft door frame
man bending hinge rod on a jeep cj soft door frame
inside interior shot a jeep cj-7 soft door frame and skin
Red Jeep CJ 7 pulling a trailer on a desert trail

The spice color of our new Supertop mates up with the bright red Jeep well, plus it won’t absorb as much heat as black or charcoal would in the Arizona sun. The side and rear window—either separately or altogether—can be removed for natural air conditioning. The top can also be slipped out of the windshield retainer channel and folded down behind the backseat, and there are short bungee strips for securing the top bows.

Many years ago Bestop perfected the art of packing a soft top, including all the hardware, into a shallow but large square box. Each window is protected with tissue paper so the clear plastic isn’t scratched during transit. Before starting the install, go through the parts list and box to make sure everything is there.

To make sure we have all the tools that will be needed—power drill, center punch, three torx sockets (#20, #40, & #45), matching ratchet, screwdrivers, hammers, and a tape measure—we started by reading through the instructions one last time before starting the install.

From the top lip of the windshield frame to the rear point of the body above the Jeep’s taillight, you want 75-1/8 inches. To achieve this measurement, use the windshield’s dashboard clamps. Their mounting torx screws are also adjustment screws, so you can loosen them and pull the windshield backward to make the distance shorter or push it forward to make it longer. Once the correct distance is achieved, tighten the screws and double-check the result.

Install the windshield brackets in each upper corner of the windshield frame. If the sun visors are still in place, remove them temporarily and then resecure them along with the brackets. Use the bracket as a template if you need to drill any holes.

Secure the two-piece windshield retainer channel. We used self-tapping screws but you might prefer to drill eleven the holes and use the included pan-head screws.

Install the side belt rails and the rear corner rails. Use the included Phillips-head bolts, washers and tapping plates. If your Jeep once had a hardtop, you will be using the factory holes. If not, you’ll need to drill all the holes—use the belt rails as templates for the holes. Do not tighten the bolts yet.

The vertical retainer mounts go just behind the door openings (you’ll have to drill the forward hole on each side for the vertical retainer mounts). You’ll also install the retainers on each side of the tailgate for the rear window bar. The rear corner belt rails will have a slight gap between them and the side rails.

Next come the bow mounts. Install the front bolt in each bow mount first (they are inside the mounts) and then the bow mounts’ rear bolts.

Lay the assembled bows on the body and align the bows’ mounting holes in the bow mounts and secure. Raise the bows and slip the vertical rods into their mounts. Attach the horizontal rod to the windshield bracket using its bailhead stud. To do this, slip the pin through the bracket opening and turn the bailhead stud a quarter turn clockwise so that the flanges on the pin are secure.

To install the cloth soft top, drape it over the Jeep with it oriented to the vehicle. Then secure its sewn-in plastic strip to the windshield retainer channel over the glass. Make sure it’s centered and then snap the inside flap to the rear bow. Now insert the black plastic strips on the rear corners of the top into the corner belt rails. Make sure the plastic corner reinforcement piece is not caught under the corner belt rail.

Once the rear corners are secure you can start zipping in the three windows, starting with the side panels.

Install the rear window last. Be prepared to spend some time with the zippers, they will be tight and difficult at first.

Now you need to assemble the doors. With this kit, I received cloth half-doors with slide-in zippered windows. First assemble the lockable door handles, which use the same striker as the factory hard doors.

Use a Phillips screwdriver on the outside and a socket/ratchet on the inside Nylok nuts. There are four for each handle.

You may have to adjust the hinge rods for the doors to fit tightly. Use a metal tube or pipe to bend them.

Once the half-doors are adjusted and fit properly, slip the three rods on the upper window half into their matching slots. There are adjustable collars on the two outer rods of each window. Use them to adjust the mating of the window to the half door.

With the spice-colored Supertop in place; the doors and windows are adjusted; and the Jeep is ready for the trail.


Share this Article
Author: Jim Brightly

A former editor of Truckin’ and Trailer Life magazines, and tech editor of Four Wheeler, Petersen’s 4-Wheel & Off-Road, and Family Motor Coaching magazines, Jim Brightly is now a semi-retired photojournalist living, writing, and wheeling in northern Arizona. He’s been building and wheeling Jeeps for more than fifty years.