Blown head gasket.
Those three words can strike fear in car novices and seasoned gearheads alike. A blown head gasket can mean costly repairs if you farm out your mechanical work. It can mean a lot of time and elbow grease if you do your own wrenching.
Blown head gaskets can be the result of detonation, poor engine cooling, or improper installation. Since we tend to cater to the do-it-yourselfer around here, we’ve decided to focus on the proper installation of head gaskets to help prevent future gasket issues. In conjunction with Federal Mogul/Fel-Pro, we’ve identified 15 installation mistakes that can lead to head gasket failure. Avoid these mistakes and you’ll be less likely to find yourself tearing your engine apart in the near future.
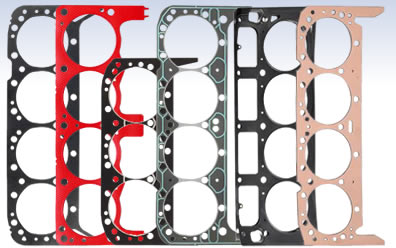
1. Choosing the wrong gasket material: You need to choose the correct head gasket technology to match your engine’s intended use. For example, Fel-Pro offers at least five different types of cylinder head gaskets for small block Chevy, and each has its own purpose:
- Single-layer embossed steel shim: Commonly used to increased compression ratio and power.
- Composite: General use on stock engines.
- Composite with copper wire ring: Performance applications using aluminum cylinder heads.
- Composite with steel wire ring: Performance and street/strip applications; well suited for forced induction engines.
- Multi-layer steel: High-horsepower street or race-only applications; well suited for forced induction engines.
For a good, basic overview of gasket materials, we urge you to read our earlier post on the topic.
2. Improper gasket and cylinder head handling: Let’s start at the beginning as you ready your new head gasket for installation. You should wash your hands before handling your cylinder heads and head gaskets, since greasy hands can retain dirt which can ultimately end up on the gasket or head surface. Surface contamination—on both the head and gasket—can prevent a good seal. Also, never set a clean cylinder head on your garage floor. The weight of the head can cause dirt to stick to the cylinder head and lead to an improper sealing surface.
3. Failure to check for flatness: Before installing a new head gasket, you should always check the surfaces of the cylinder head and block for flatness by using a straight edge. With the straight edge sitting across the surface, you can then use a feeler gauge to pinpoint any excess clearance. Too much clearance means the surface is not flat enough to retain a seal, and you’ll need to have it re-surfaced.
4. Ignoring surface flaws: If the cylinder head or block has pitting, corrosion, cracks, ridges, or low spots, there’s a potential path for leakage. If you notice any of these flaws, you’ll need to have the head or block resurfaced.
5. Failure to adequately clean the deck surface: Check the deck surface for leftover remnants from your old gasket before installing your new one. Any debris will effect the seal of the new gasket. Use a gasket remover or surface degreaser in combination with a wire brush to remove any remaining material. For aluminum heads, use a non-metallic scraper to avoid gouging the surface.
6. Improper use of sealers: Old school embossed steel gaskets required the use of a sealer to cold seal the engine. However, most modern gaskets (with a few exceptions) should not be coated with a sealer. And never use a chemical sealer of any kind on coated gaskets! Sealers, such as RTV silicone, can interfere with other chemicals that have been put on the gasket to assist with sealing. The result could be poor sealing, deterioration, or even complete gasket failure. Also, RTV silicone could potentially run when the head is clamped down and flow into the cooling jackets or combustion chamber.
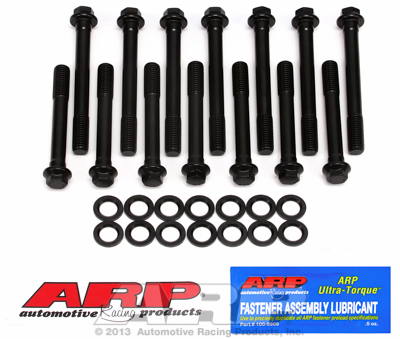
7. Using damaged head bolts: Dirty or damaged threads can give false torque readings and decrease the bolt’s overall clamping force. Carefully inspect your bolt threads and replace any bolts that have deformed or worn threads. Also, be sure to lubricate the underside of your head bolts and washers (if equipped).
8. Failure to inspect head bolt holes before installation: Deformed or dirty head bolt holes can also reduce clamping force. Unless OE instructions say otherwise, you should run a bottoming tap down each bolt hole. The tops of the hole should also be chamfered so the uppermost threads won’t pull above the deck surface when bolts are tightened.
9. Reusing old bolts: Torque-to-yield (TTY) head bolts are designed to stretch slightly when installed, creating an elastic effect that adds to the clamping force of the fasteners. Because TTY bolts may stretch permanently, you should never reinstall them. This can cause them to stretch even more and compromise the clamping force of your bolts.
10. Failure to check bolt lengths: It’s a good idea to verify you have the correct bolt lengths for your application and each specific bolt hole (some holes require longer bolts than others). Measure each bolt and compare to one another to check for stretch.
11. Cylinder head galling: If you’ve got aluminum cylinder heads, be sure to use hardened steel washers under the bolts to prevent galling the head surface and ensure even clamping on the soft aluminum.
12. Improper use of a torque wrench: It goes almost without saying, but don’t trust a cheap torque wrench to give you accurate torque readings when torquing down your head bolts. Using a good-quality torque wrench, tighten down your head bolts in at least three steps to get up to the indicated torque specifications. Also, be sure to tighten with a smooth motion—sudden or jerky movements can yield false torque readings!
13. Not following proper torque sequence or specs.: Always follow the recommended torque specifications and pattern. Again, torque down the bolts gradually in at least three steps to create a more even clamping force.
14. Not re-torquing when necessary: Some head gaskets will require re-torquing of the head bolts. If your manufacturer specifies that re-torquing is necessary, run the engine until it reaches operating temperature and then turn if off. Re-torque each bolt to specification while the engine is still warm unless using aluminum cylinder heads. On applications with aluminum cylinder heads, we’d recommend you wait to re-torque the bolts until the engine has cooled down.
15. Opting to not bleed the cooling system: According to Fel-Pro, localized hot spots are one of the main causes of head gasket failure. That’s why the company recommends that you bleed the cooling system when installing new head gaskets. Any air pockets can heat up and cause the cylinder head to grow and, consequently, flatten out the head gasket’s combustion seal.


thanks, I am an old mechanic and your words are great, we all can learn something new, Allen
You forgot copper head gaskets and purpose. Thanks for the article!
Adam Wepp
Wyo Tech
Copper head gaskets were primarily used on early American v8s with highercompression ratios
Copper head gaskets are very relevant for many engines today and decades past. They are mostly used in extreme applications only and generally are not ideal for street applications although some do. Most all require stainless steel O-Rings to be machined into the deck of the block or cylinder head around the combustion chamber, except for SCE Gaskets ICS series. Most all copper head gaskets require a light spray of copper coat on both sides as well. Generally copper gaskets are the go-to when all other gaskets are failing and you’re building big power.
You forgot to clean the treads with a tap on the block for proper torque specs….
Do NOT use a tap to clean threads, use a chaser, less material will be lost
That is correct about a chaser. But number 8. Incorrectly says to use a tap.
[…] operational problems. Using the correct gasket material will prevent major design issues. But with installation, there is more to account for. To prevent future head gasket problems, special precautions can be […]
[…] lore to me. probably started by somebody who failed at one of the items listed in this link. Blown Head Gaskets and How to Avoid Them googletag.cmd.push(function() { googletag.display('div-gpt-ad-14'); }); […]
Single-layer embossed steel shim: Commonly used to increased compression ratio and power. The Oldsmobile Engines of the late 60’s used these gaskets for the highest compression ratios and highest horsepower ratings. Gaskets like this were commonly available and even were part of overhaul gasket sets – until they weren’t.
Bolts that are not the newer TTY CAN be reused. As long as it pulls to torque, it’s good to go. If it doesn’t pull to torque, or stretch properly, toss it.
does a 2001 chrysler 3.8 town and country engine use tty head bolts? ray
head gaskets blow just happens to mopars motors my experience chevys bearings wash out always did warm ups why’s that happen again?
[…] operational problems. Using the correct gasket material will prevent major design issues. But with installation, there is more to account for. To prevent future head gasket problems, special precautions can be […]
Good article. If you do have to shave the head to get it flat, you should make note of how much was shaved and use a thicker gasket to compensate, or your compression will be a bit higher. Also, there’s a limit to how much can be shaved.
What has been said is absolutely correct, but one item was not mentioned I believe which always seems to happen always keep the surfaces sparkling. Clean