When it comes to fabbing hard lines, there are no real tricks involved.
It’s just a matter of measuring, trial and error, and patience. The main goal is to build lines that are functional and leak proof, but you also want to make them look good too. In the end, you’ll discover that mistakes can and do happen when forming hard line, but it’s all part of the process.
The biggest issue to watch for is leaks.
The Problem: Leaky Hard Lines
Leaks are particularly troublesome with brakes, although a leaking fuel line is obviously big trouble too. Often, leaks are the result of an inconsistency of some sort within the fitting. You must have a clean, concentric finish on the tube flare that allows the fitting to seat properly.
In order to fab hard line, you have to cut it first. There are lots of ways to slice line, but a good quality tubing cutter will cut through hard line like butter. Once sliced, it’s a very good idea to dress the cut with a fine-tooth file. Only then should you fit it to your flaring tool.
With the rigid 37-degree flaring tool we regularly use, approximately 0.100-inch of tubing must overhang from the flush surface of the tool. With the tubing locked into the tool, turn the large top handle until the internal cam releases. At this point, you can release the tubing from the tool. Once again, it’s a good idea to dress the flare edges with a fine file.
Now you’re faced with one more issue: How do you successfully debur the inside of the flare you just made? You can’t stick a file in there, and there’s no way to get inside with a stone and get it right.
That’s where the Koul Tools Surseat flare lapping tool enters the equation.
The Solution: The Surseat Tool
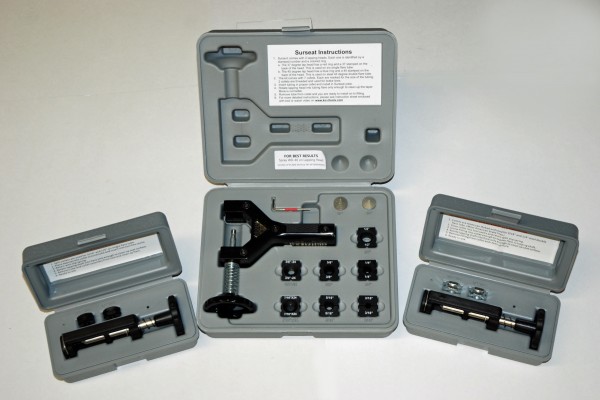
The unique Surseat tool allows you to get inside the flare and physically lap the metal. The Surseat lapping kits incorporate a diamond dust-coated lapping head to gently lap in a flared tubing end to create a better seal. The kits will smooth out irregularities that can cause leaks and assembly issues.
If you suspect a leak, the best bet is to unscrew the fittings and remove the suspect lines when possible. For fittings ¼-inch or larger (-4 AN and up), an Earl’s Pressure Test Kit works great for the job. Essentially, the Pressure Test Kit includes plugs to block off the lines and then the line is pressurized by way of an air compressor. You simply submerge the line in water and watch for bubbles. Escaping bubbles clearly indicate you have a problem that needs to be addressed. We’ve covered this process in detail in this earlier article.
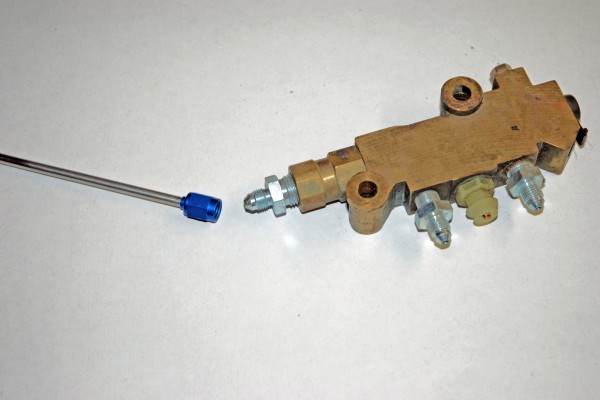
If you discover a leak, inspect the fittings closely. The folks at Koul Tools note that a leak in the fitting could be the result of a score in the conical surface of the fitting. A fitting can also get damaged by over tightening it with an imperfect flare, by dropping something on the fitting, or some other accident. Most often, though, it’s the actual flare on the hard line that causes the grief. It’s easy to get a mark or tiny burr on the flare when flaring line. Sure, you can replace the actual line in question, but in many cases, that’s a ton of work.
The solution is to lap the flare with a Surseat tool.
Why lap the flare? The folks from Koul Tools point out:
“Lapping is a tried and true practice that goes back 100 years. Even with the best equipment, mechanics always lapped engine valves to ensure they wouldn’t leak. It occurred to us that lapping the flare on the brake line could get the tube to seat with the fitting. We decided to apply this principle to flared tubing, and in the process it fixed the leak experienced in our antique Packard. This was how we came up with the idea for the Surseat flare lapping tool.”
The Surseat’s diamond dust-coated lapping head is designed to clean up tubing flares. This, in turn, allows the flare to properly seat with the fitting. Surseat tools come in three different models. Model P-51 has interchangeable 37 and 45 degree lapping cones and will work with 3/16- to 1/2-inch tubing. The P-45 and P-37 models (also known as “Minis”) are designed specifically for brake lines. The smaller size and rectangular shape make it easier to work in tight spaces inside and under the car. The P-45 and P-37 models are great for fixing a leak in an existing brake or fuel line; however, they can also be used to lap-in your lines when installing them in order to avoid getting a leak in the first place. In fact, it’s a very good idea to lap each of your flares prior to assembly for clean, leak-free results.
So how does the Surseat tool work?
Check out the accompanying photos featuring the P-51 model.


Good article Wayne. I find that stainless lines are the worst due to the hardness!