I have a 350 small block in my Model A roadster that I’ve put lots of miles on over the years. Recently the mechanical fuel pump quit on me so I replaced it. Within a couple of minutes of running with the new fuel pump, fuel started to shoot out of the vent tubes on my Q-jet carburetor. What would cause this to happen and how do I fix it?
W.H.
This is a fairly common occurrence after swapping fuel pumps. What happens is the fuel runs dry in the float bowl on the carburetor and in the fuel line from the pump to the carburetor. Then when you replace the fuel pump with a new one, it immediately rushes fuel from the pump through the line to the carburetor and into the float bowl.
This sudden rush of fuel can knock dirt and/or corrosion loose from the fuel line and then carry it to the carburetor. Often what will happen is this debris will become lodged between the needle and seat on the float system.
This debris will then stick the float in the down position and allow excess fuel into the float. This excessive then will over-fill the float bowl and begin dripping out of the boosters and flowing out the top of the float bowl vent as you described.
How to Fix a Stuck Q-Jet Float
The repair for a Q-jet is a bit more involved than for a Holley carburetor. With Holleys, often you can tap in the needle and seat adjuster screw and sometimes this will dislodge the debris and clear the needle and seat. But more often than not, it will require removing the needle and seat assembly from the carburetor and cleaning the debris.
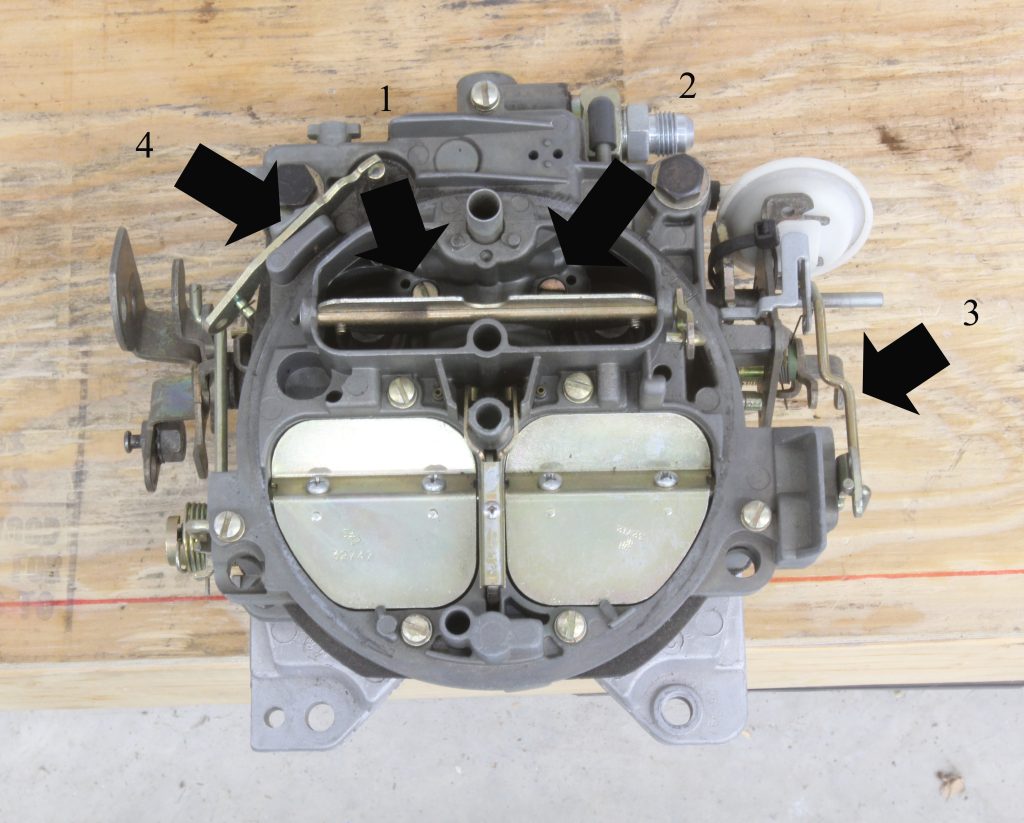
With a Rochester Quadrajet, the process of cleaning the needle and seat is the same but it requires much more effort to access the needle and seat because the lid must be removed to access the needle and seat. The Q-jet has 8 small machine screws that attach the lid to the main body that must be removed plus two 5/16 inch bolts that attach the carburetor to the intake manifold.
Two of these small machine screws are hidden inside the primary venturi and are easily missed. But before you can remove the carburetor lid, you must also drive out the roll pin that is the pivot for the accelerator pump arm. The only way to drive the pin is with a very small pin punch that pushes the pivot toward the choke housing. Do not drive the pin all the way against the choke housing as this will make it much more difficult to slide the pin back in when re-assembling the carburetor.
Next, you will also have to remove the very small screw that holds the secondary metering rods in place. You can remove the lid without removing the metering rod, but you will have to remove them to install the lid.
You will also have to remove the arm between the secondary air valve door and the plastic secondary diaphragm to fully remove the lid from the main body of the carburetor. Once the lid is removed, you can easily access the needle and seat and clean out any debris. If the carburetor is a few years old, it might be a good idea to replace the lid gasket with a new one.
Or if the carb is crusty, this would be a good time to remove the carburetor from the engine and rebuild the carb completely Summit Racing offers two different JET Quadrajet rebuild kits, so the right kit will depend upon the year of your Q-jet.
Removing the lid is a major portion of the work to rebuild your carb, so a rebuild might not be a bad idea.
- JET-201004 – Quadrajet Rebuild kit for “4M” Pre-Emission Carburetors
- JET-201003 – Quadrajet Rebuild kit for “M4” Emissions-Era Carburetors
Other Things to Consider
Before re-installing the carburetor, it is be a good idea to disable the ignition and place the fuel line in a large container and pump about two or three pints of fuel into the container. This is recommended anytime you replace a fuel pump to dislodge any debris and catch it in the container. If there is no dirt or crud in the container, then you can re-install the fuel line to the carburetor and you should be ready to run.
Assuming the stuck float has pumped a sizable amount of fuel into the intake manifold, much of that fuel will probably find its way into the oil pan past the rings. It would be a god idea to change the oil and filter before running the engine. This will ensure good lubrication especially for the rings in the first few minutes of engine operation. It might also be a good idea to pull all the spark plugs and spin the engine over to force out any liquid gasoline. Your rings and cylinder walls will thank you for this.


Very common for today’s stock replacement mechanical fuel pumps to have too much fuel pressure. I have seen as much as 15 PSI. Carter mechanical pumps are the only ones I have found that reliably stick to the advertised stock fuel pressure specs that won’t require adding a regulator.