We won’t lie to you—adding stripes and graphics to a muscle car is not for the faint of heart. You must be methodical and have plenty of patience or you’ll end up having to do them all over again or live with a misaligned mess. Neither is a pleasant thought.
That doesn’t mean you can’t lay down your own stripes. That’s why we stopped by The Restomod Shop to document how restoration tech Terry Simpson installed a stripe kit on a concours-level 1969 Shelby GT350. You can use the same techniques to apply stripes to your car.
If you want to try your hand at installing stripes, Summit Racing has a large selection of decal-style stripe kits for classic GM muscle cars, Mustangs, Gen 6 Camaros, and even Jeep Wranglers. The results with be well worth the effort.
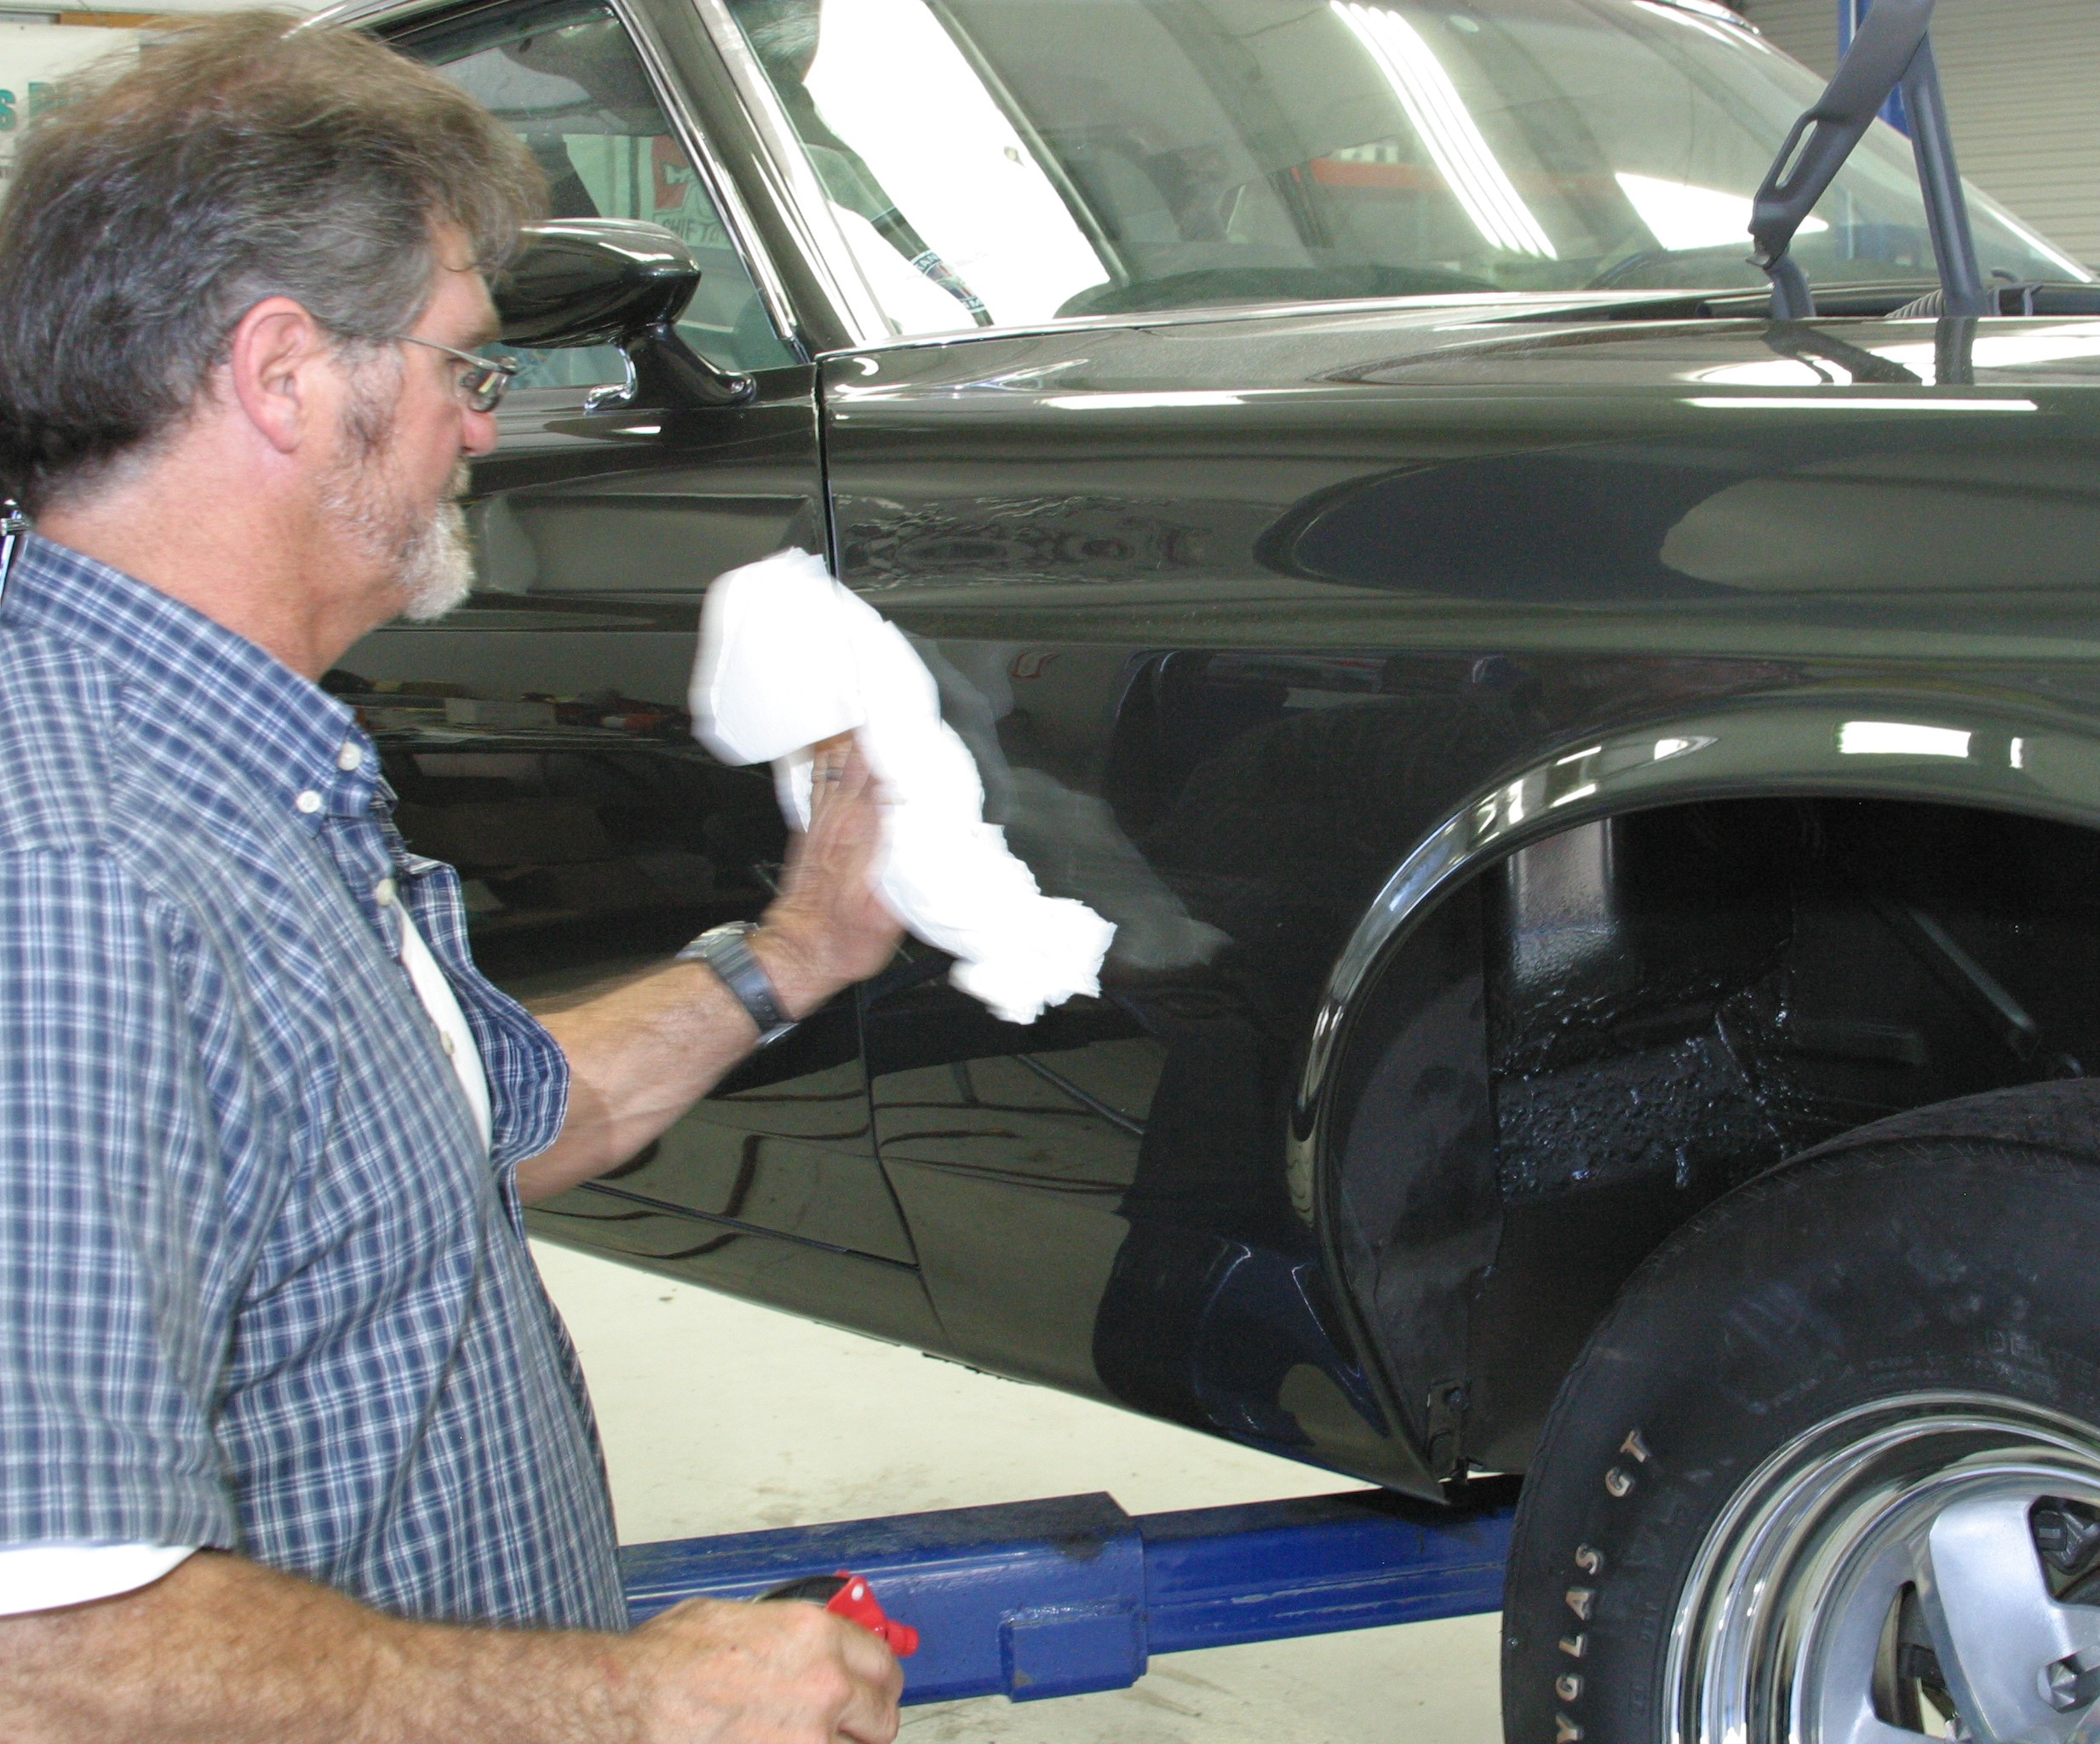
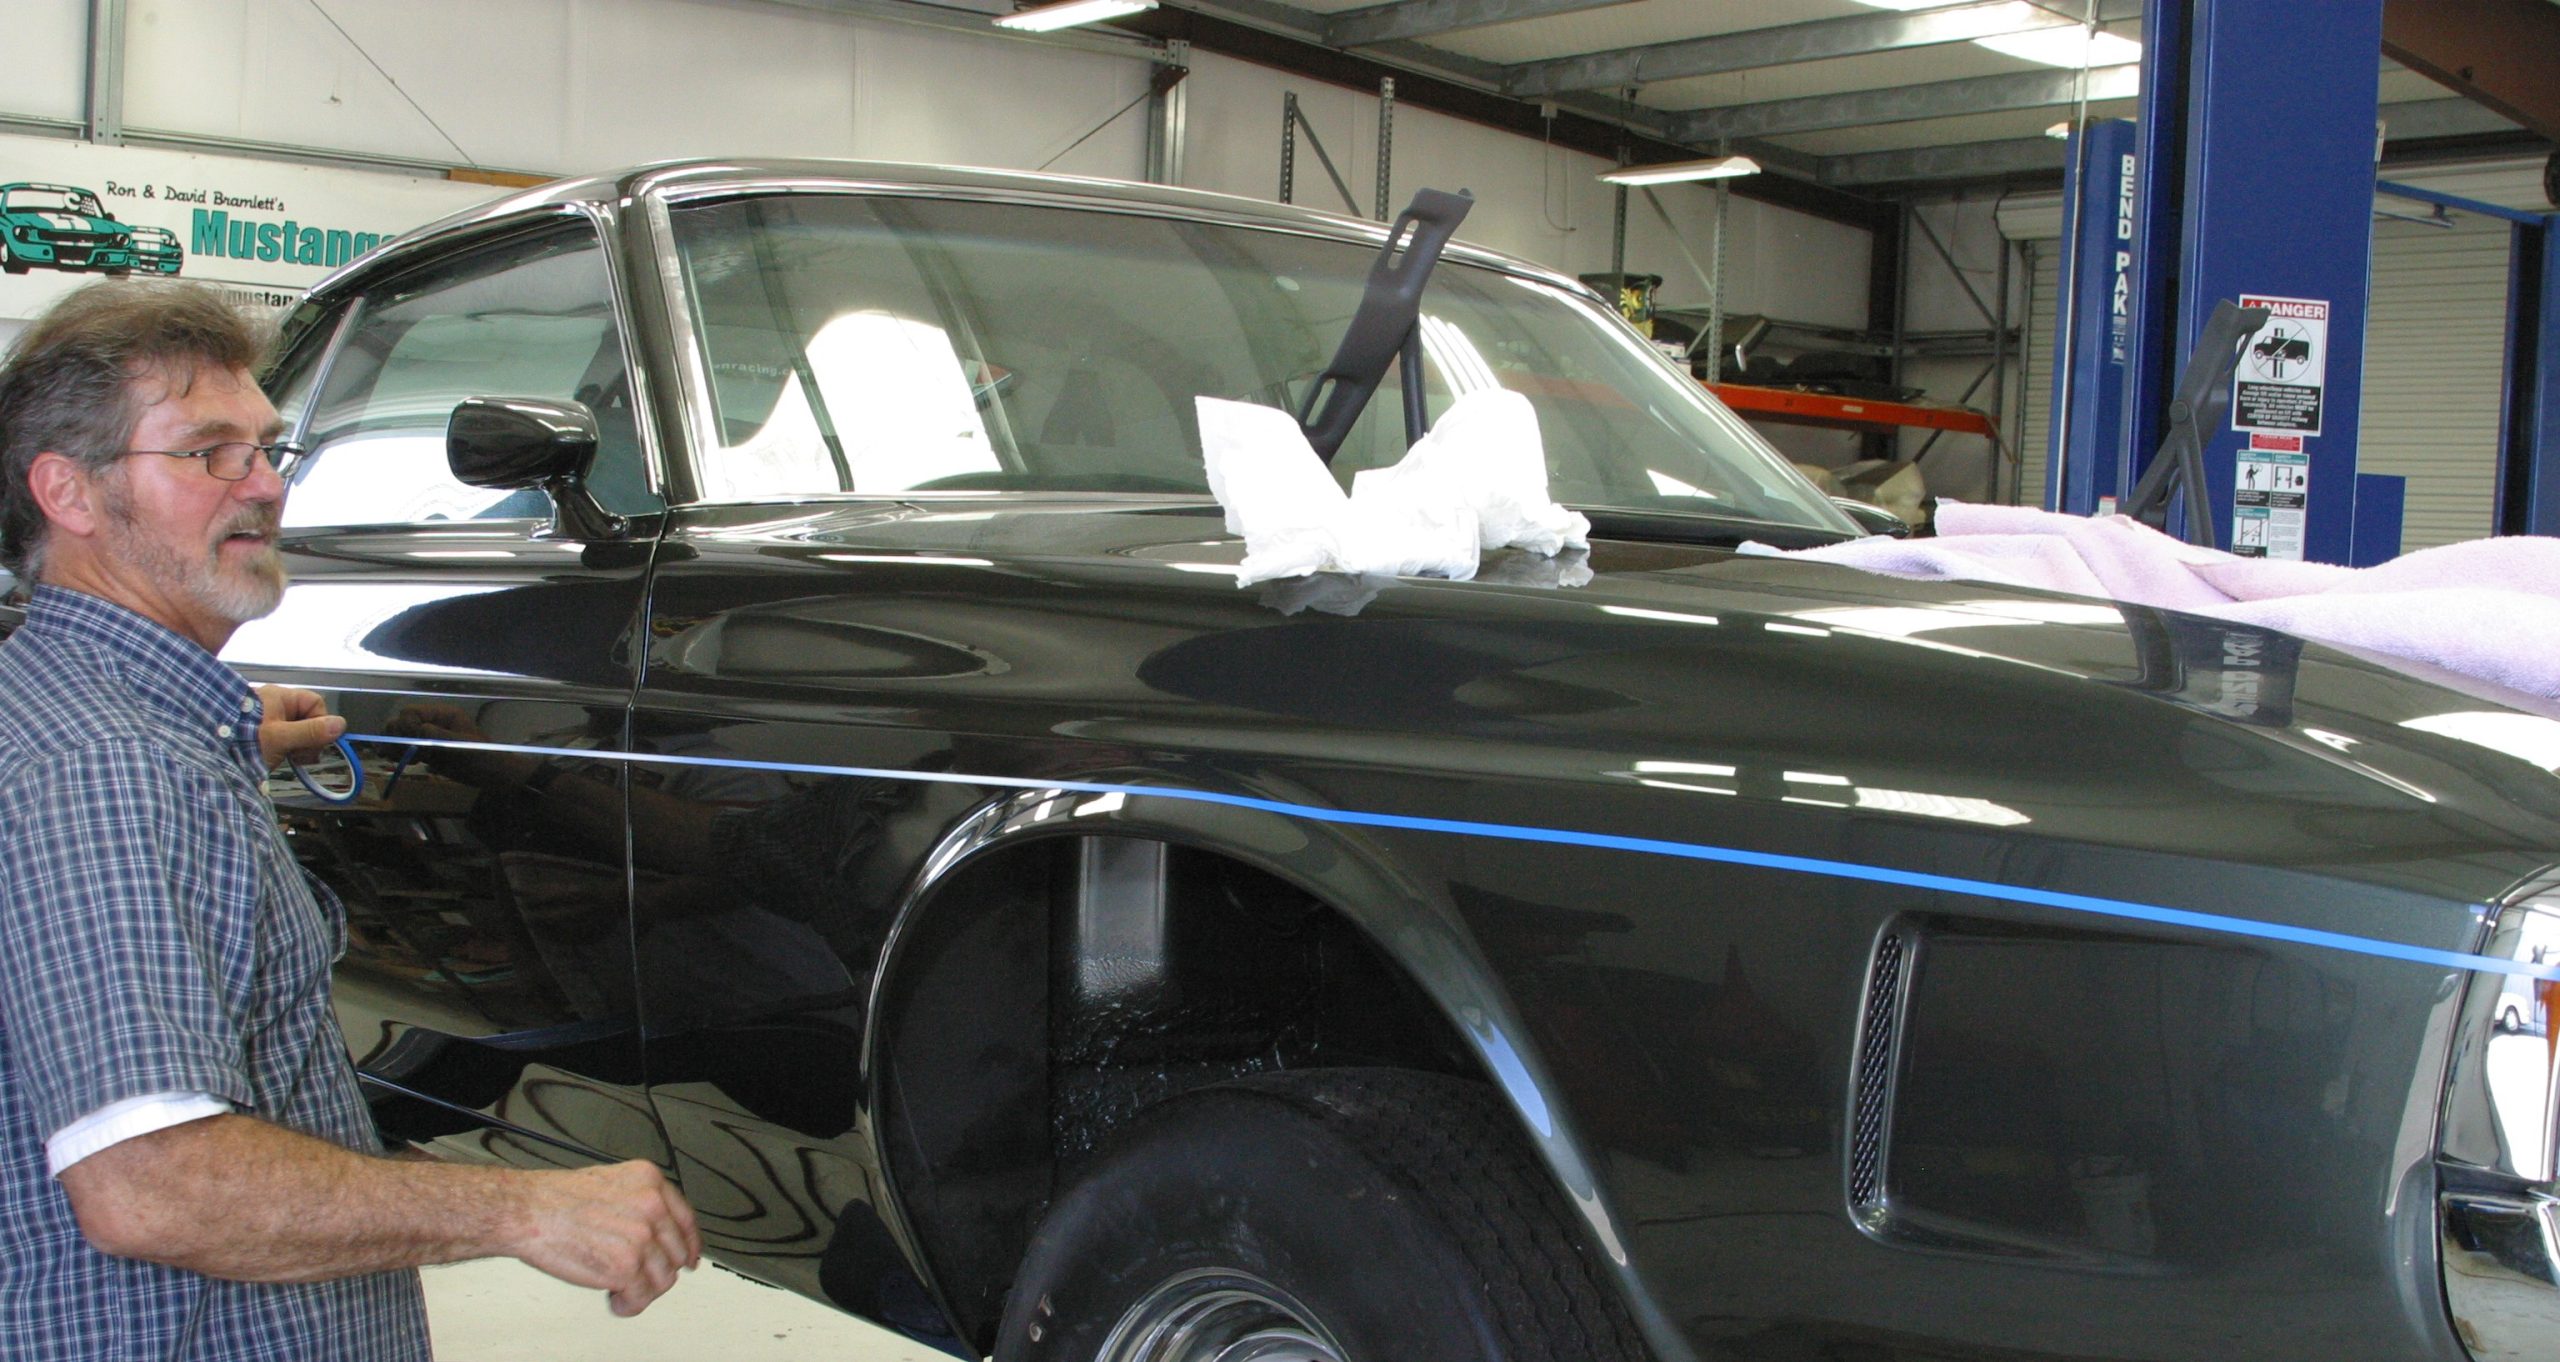
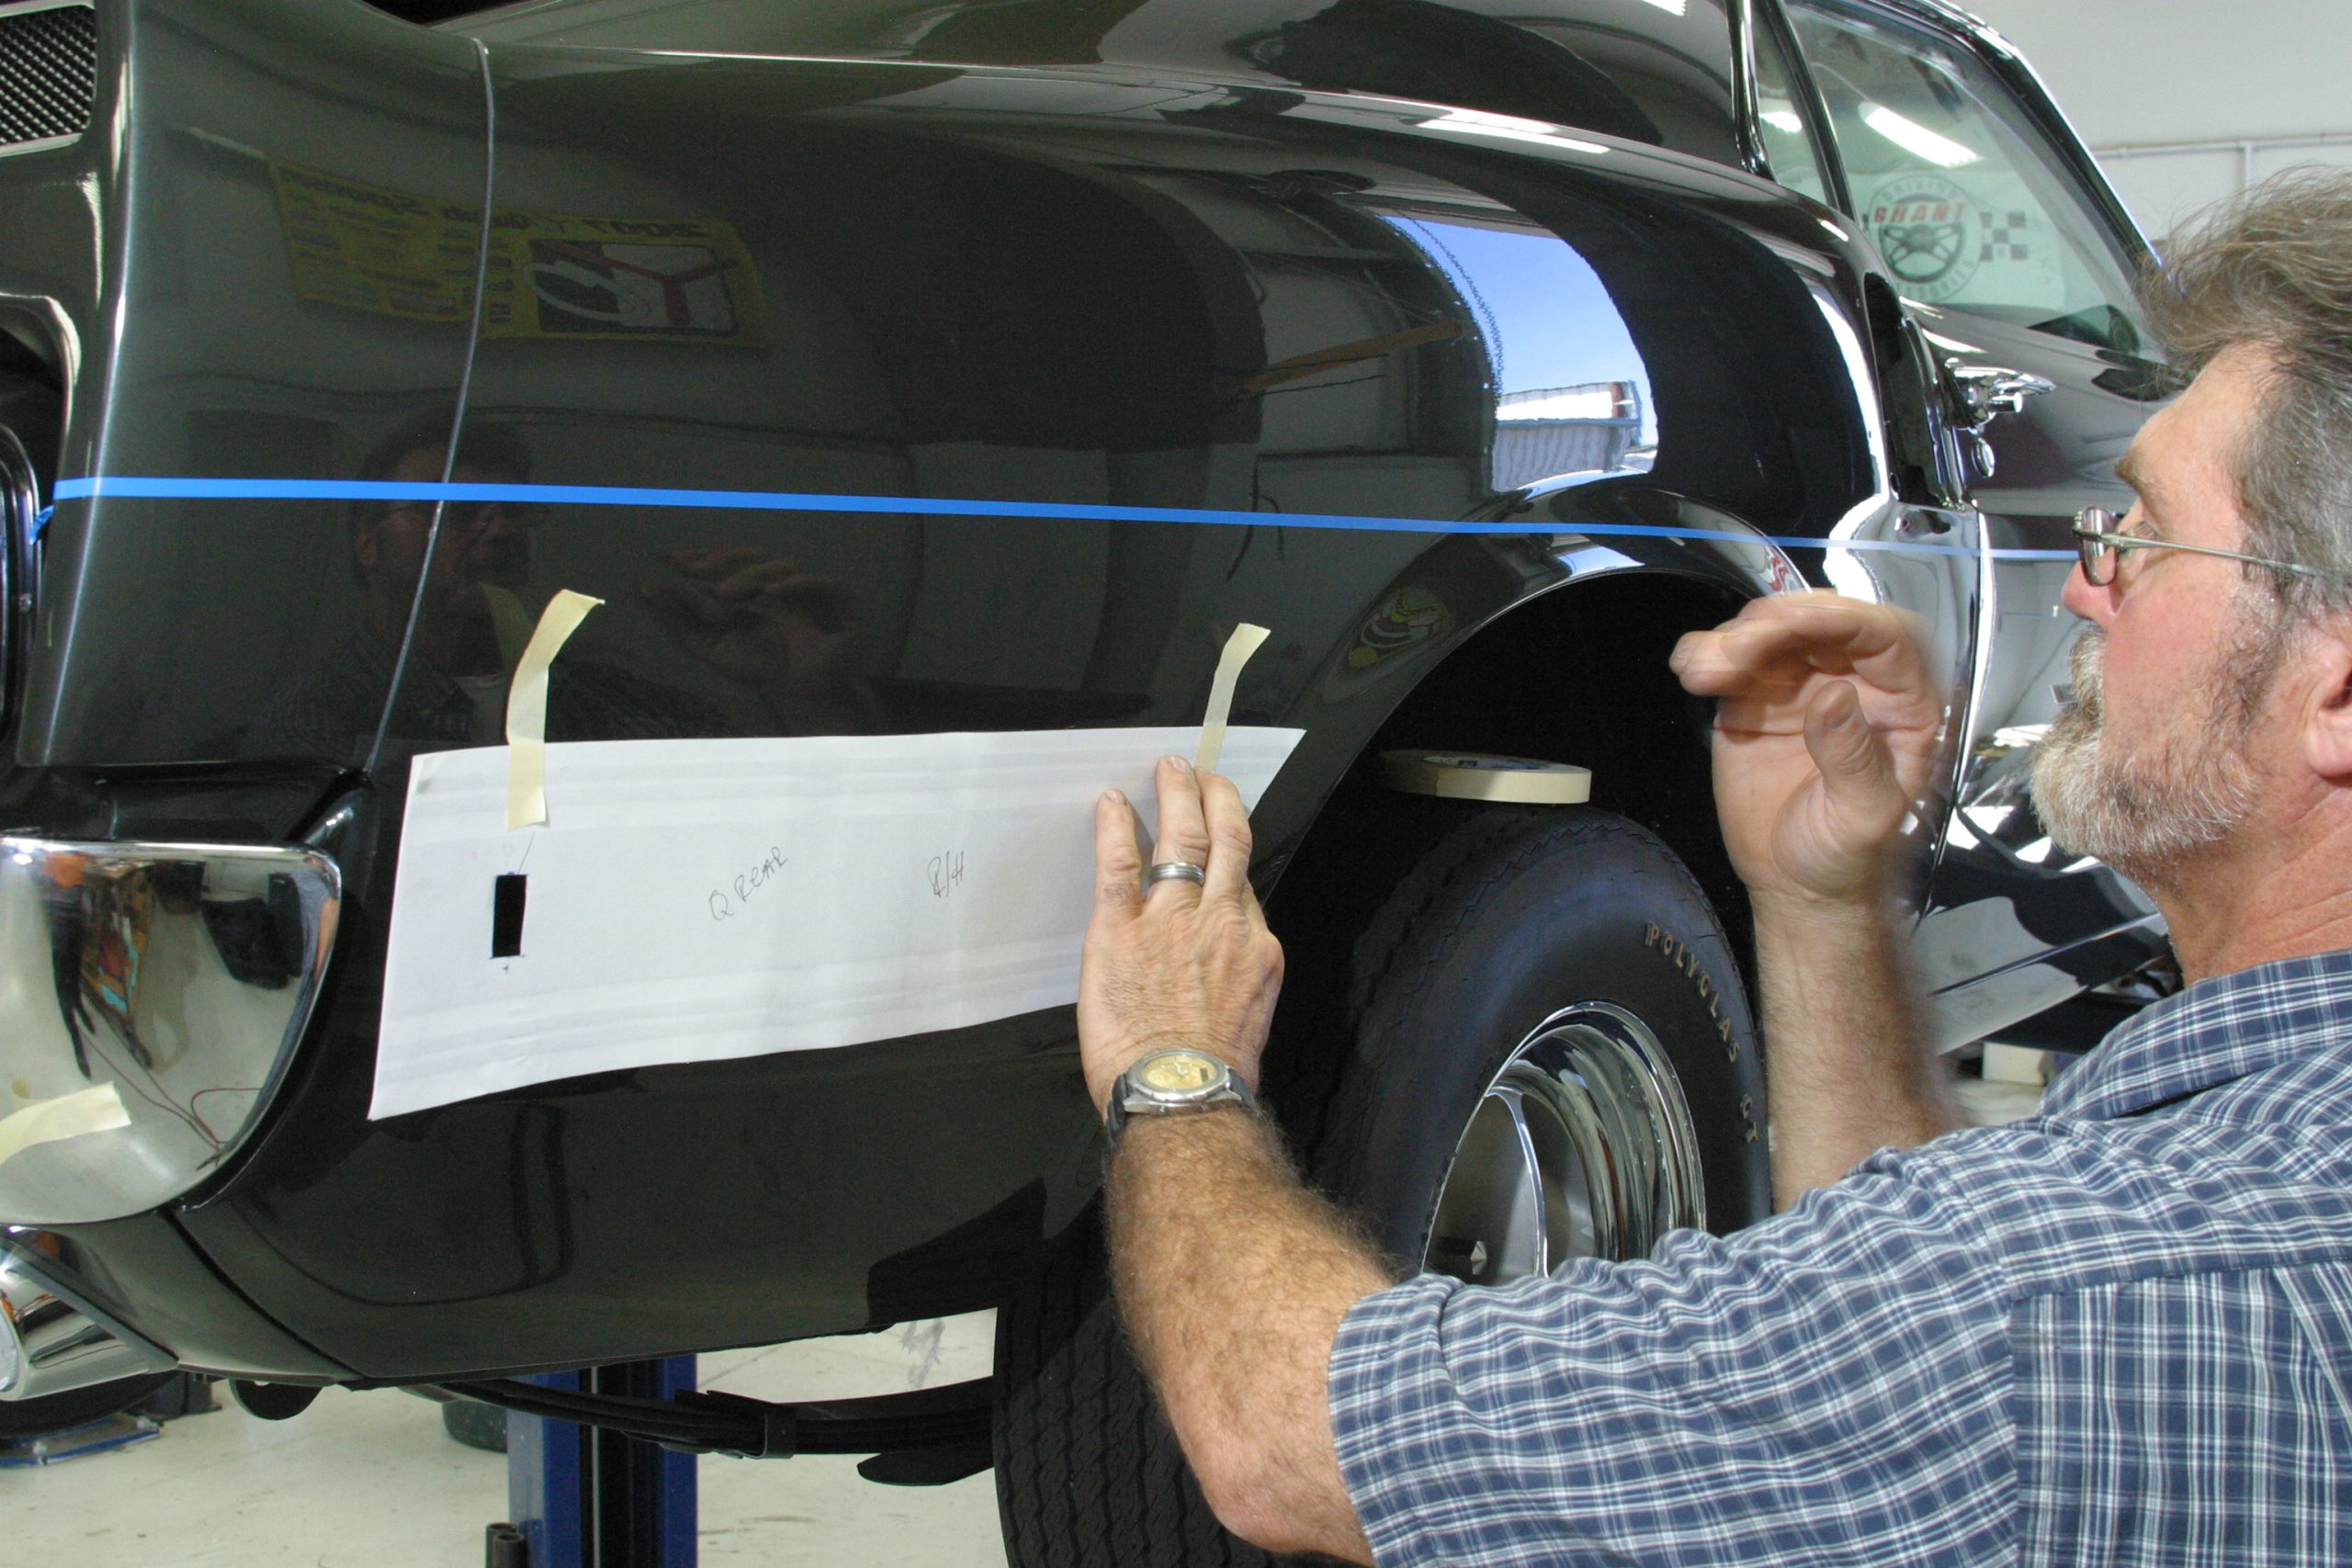
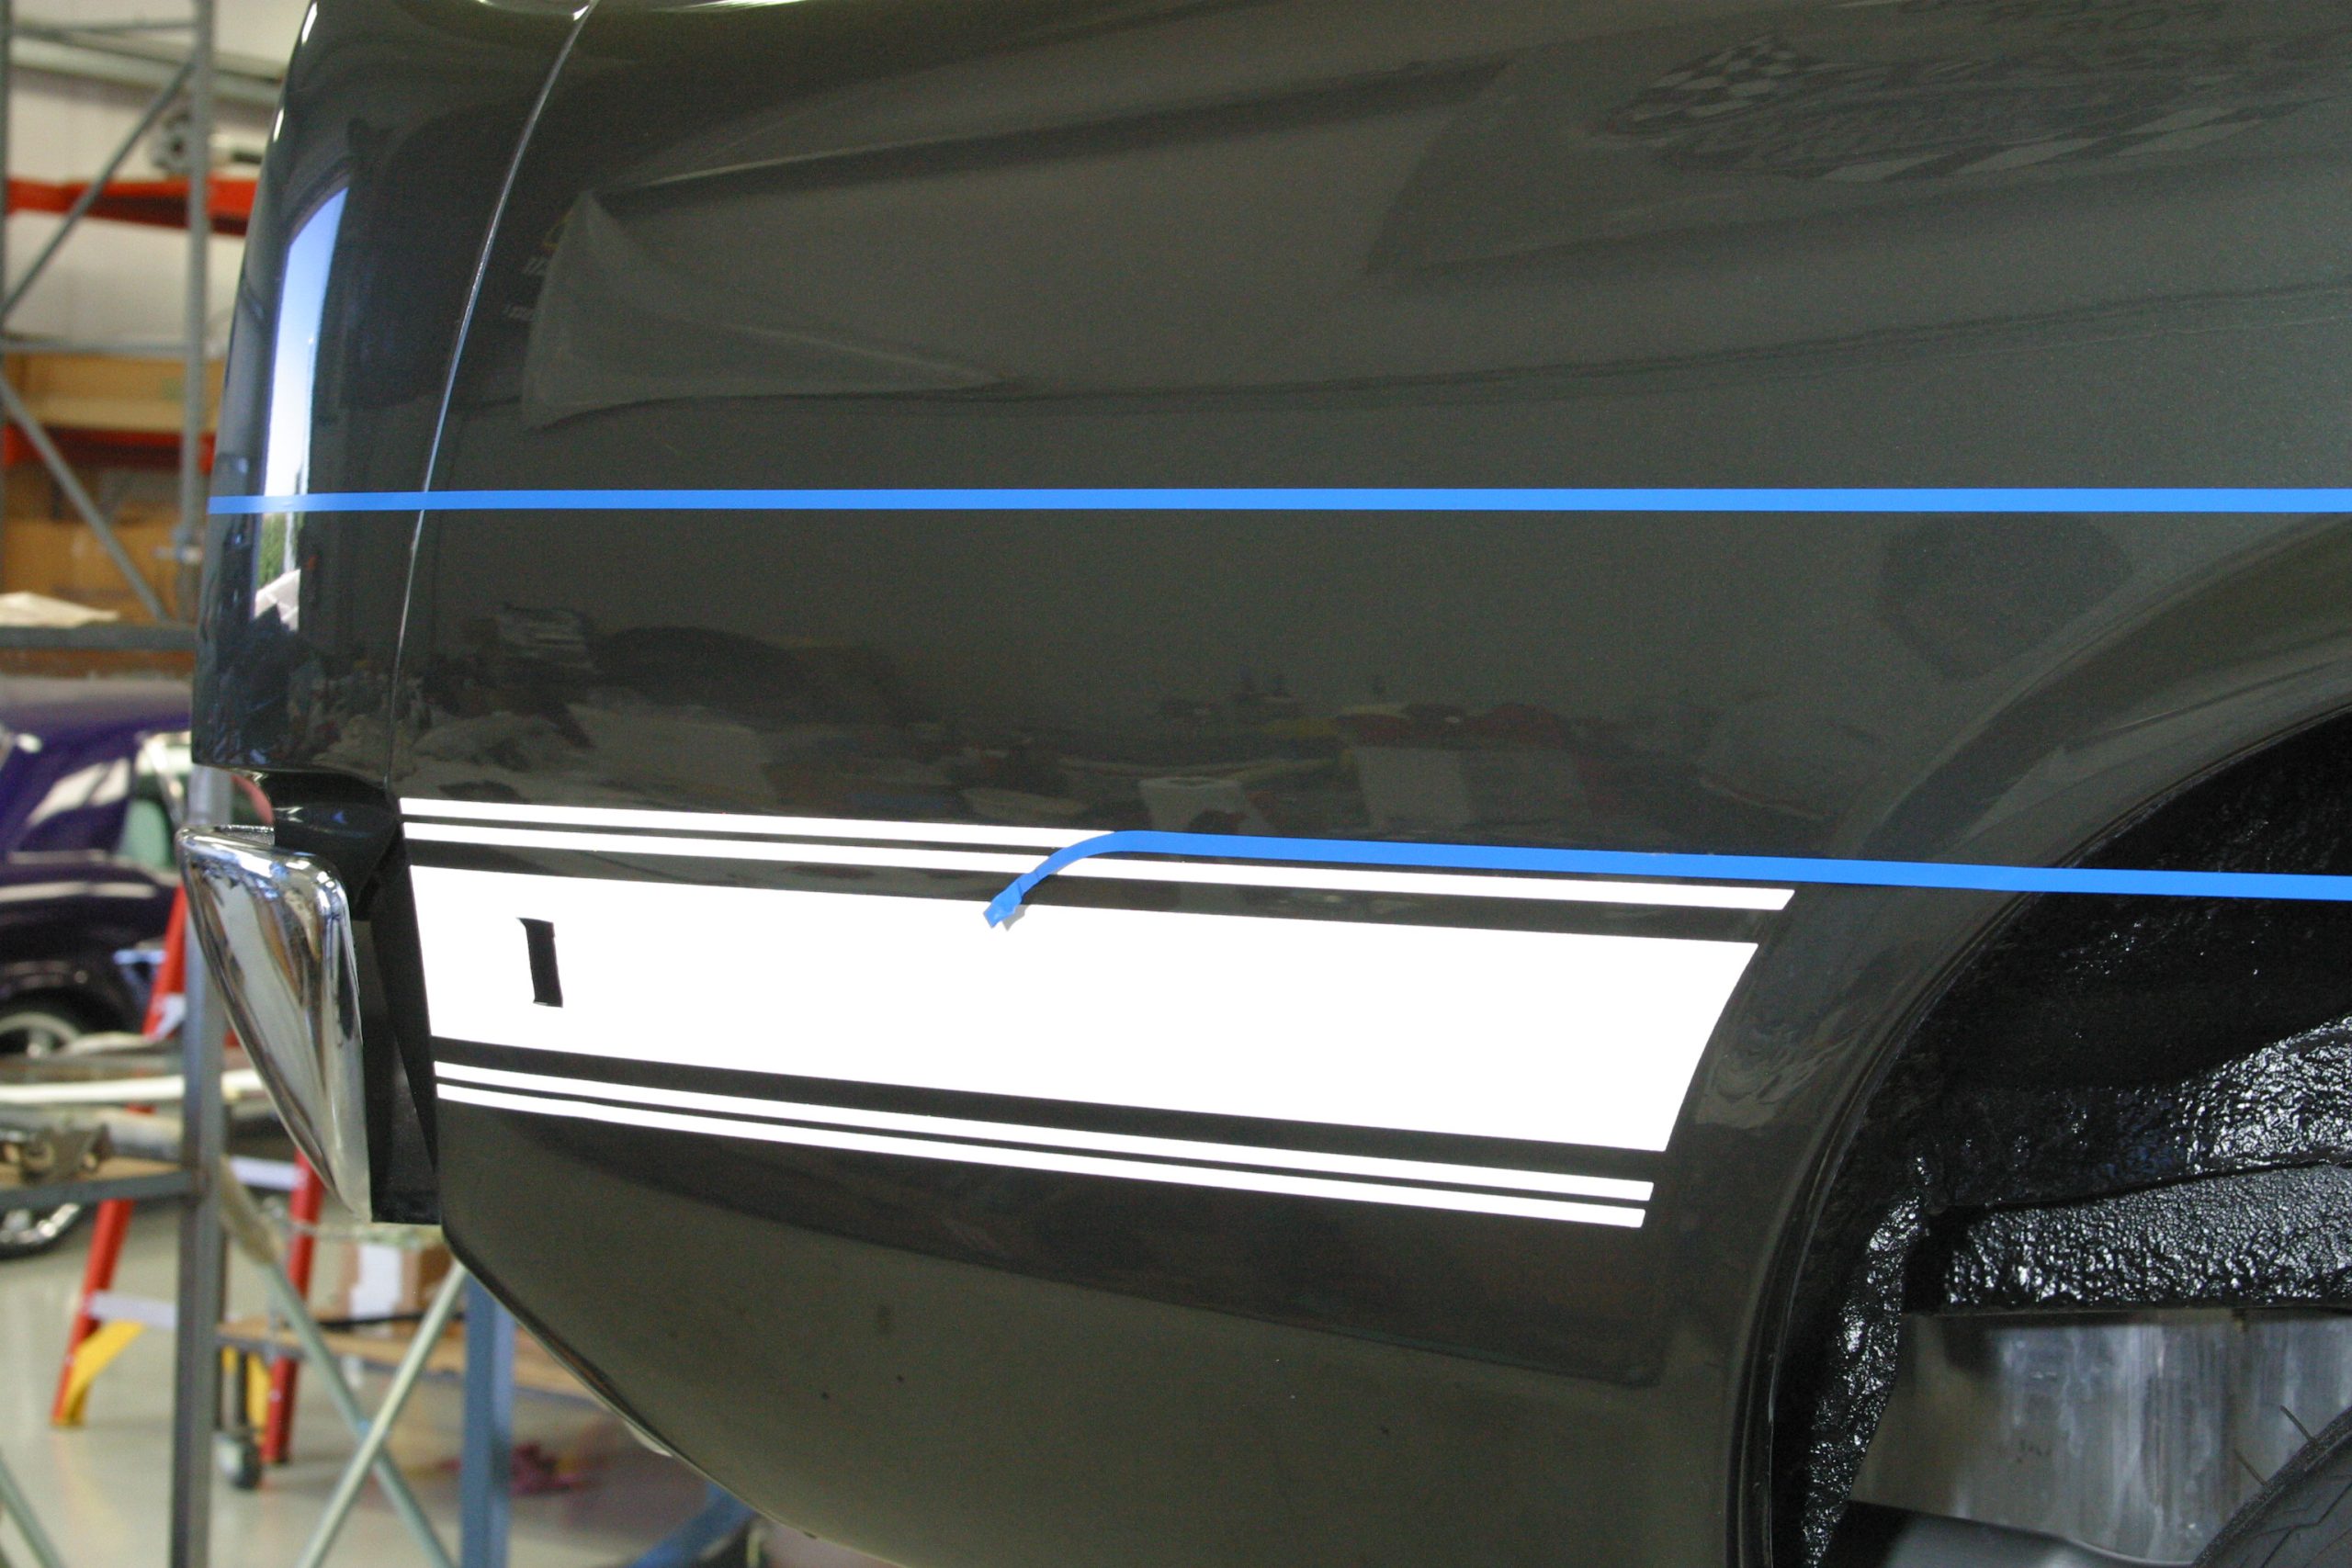
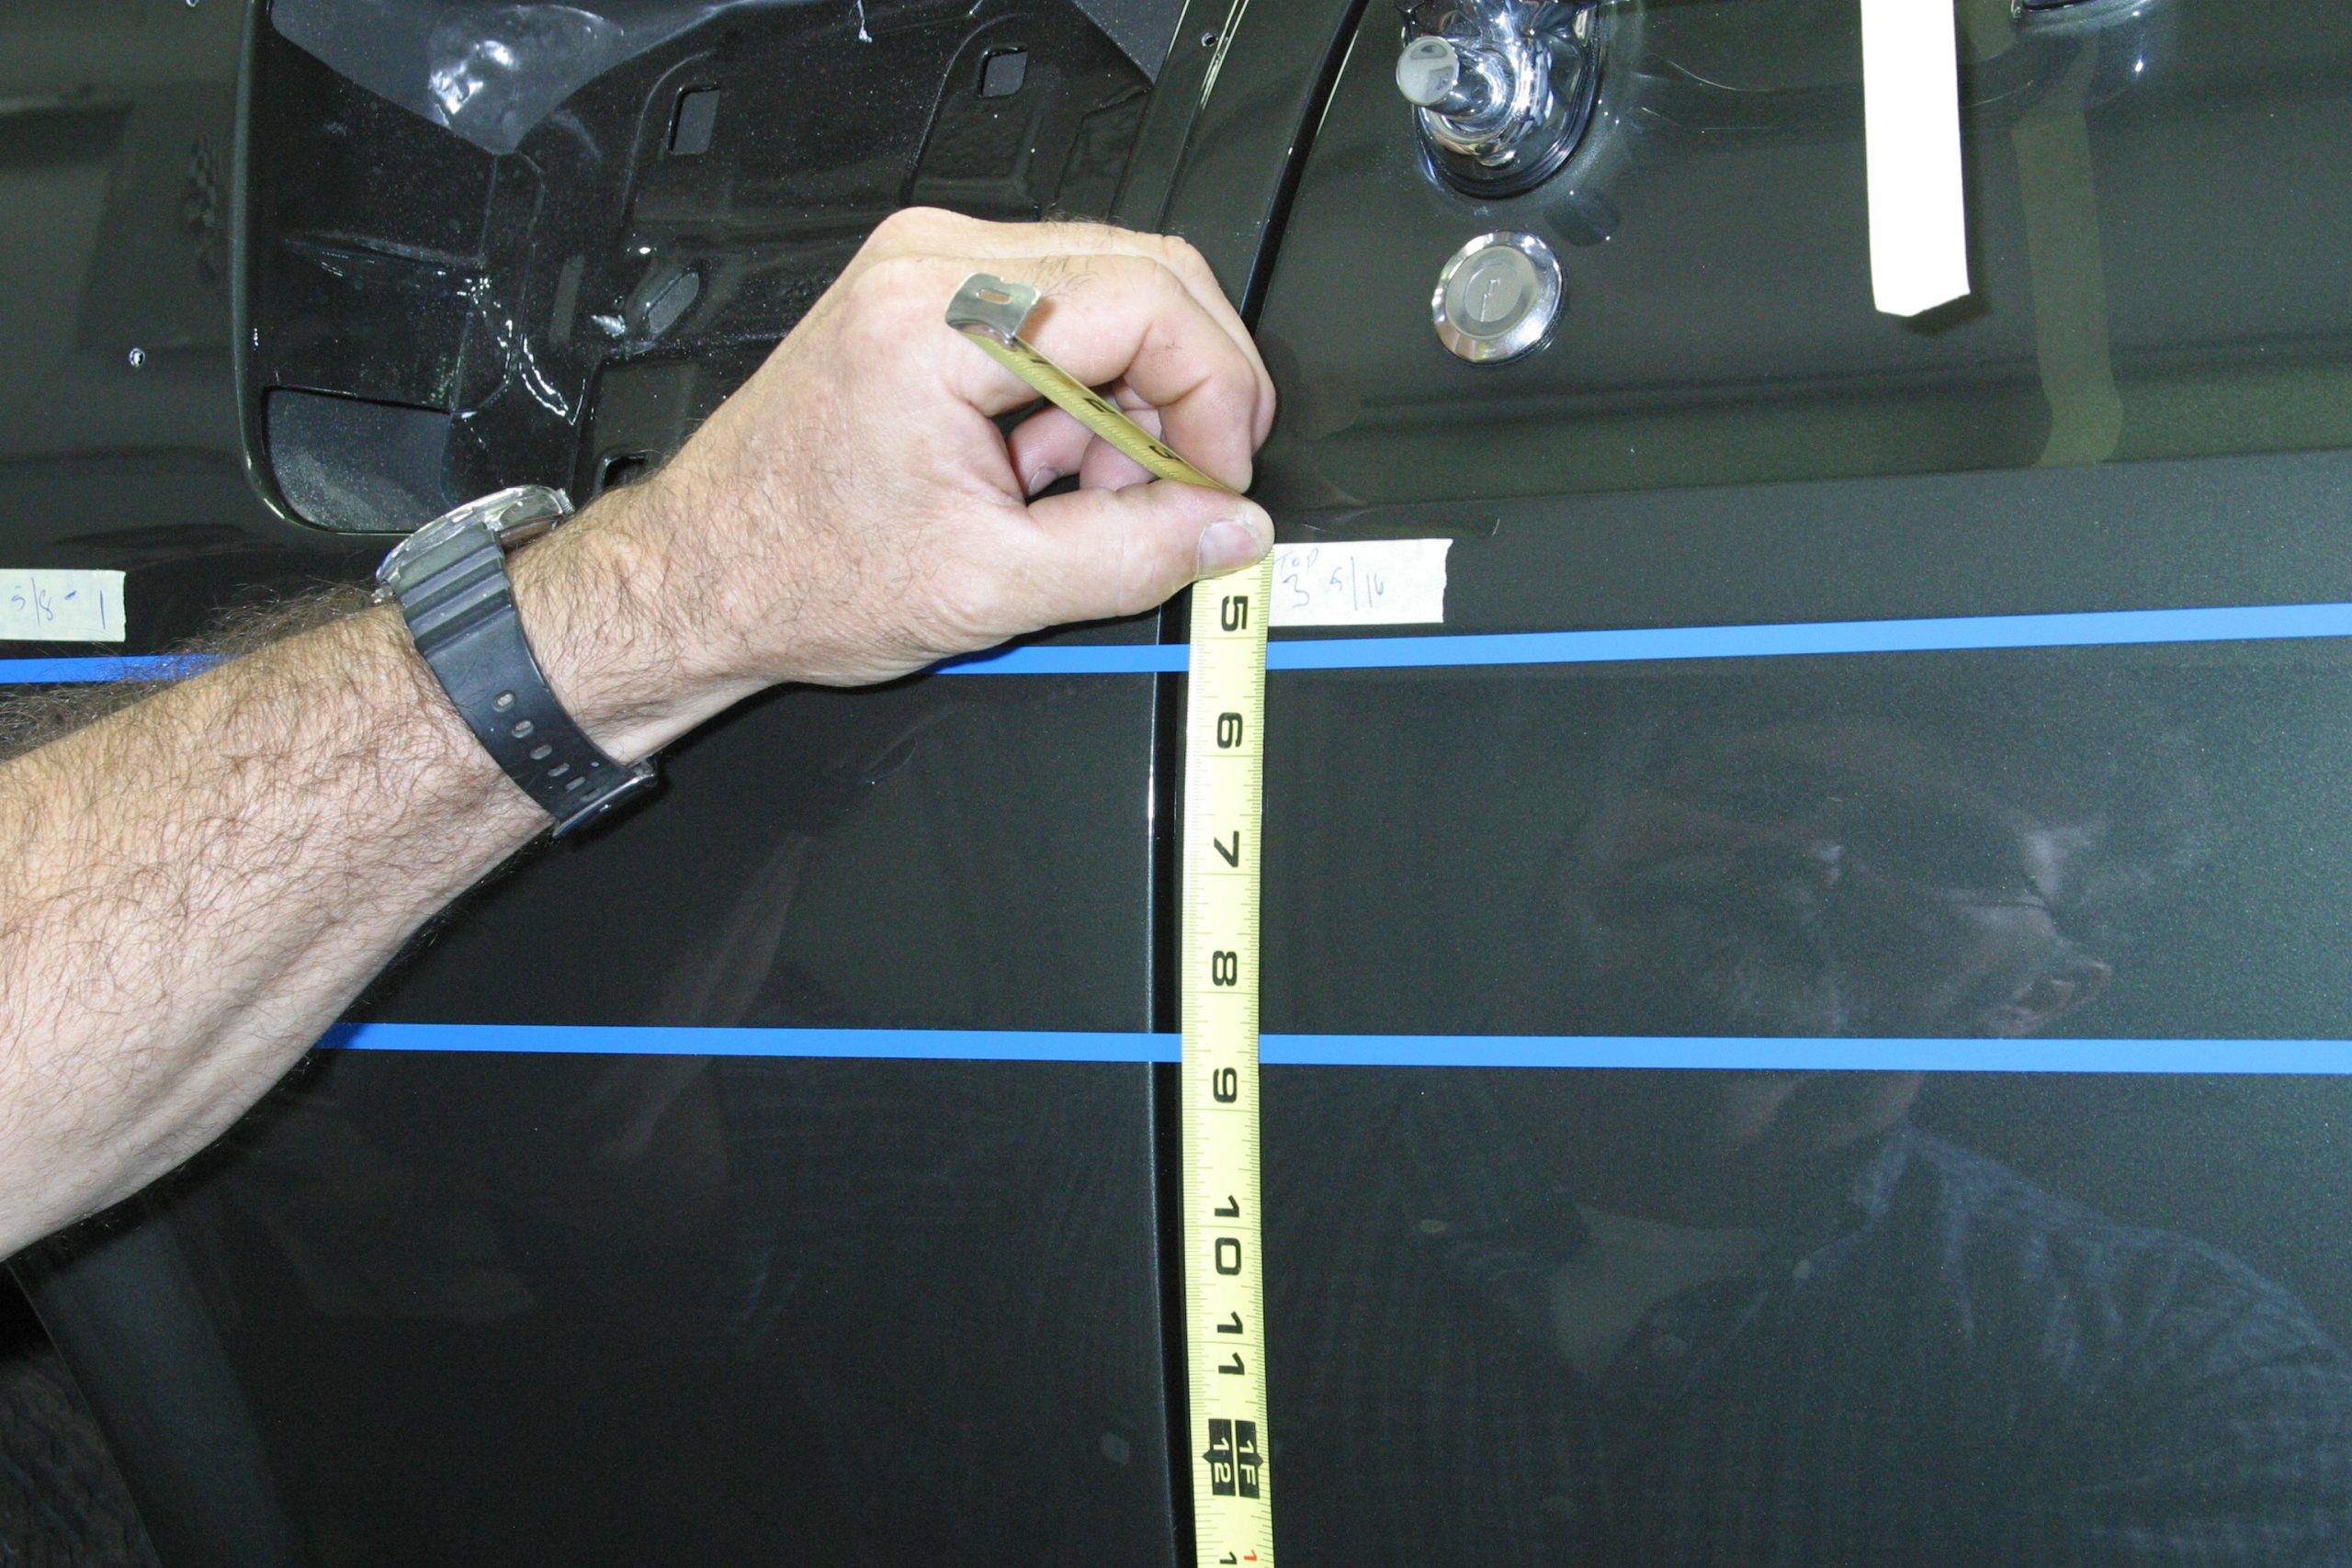
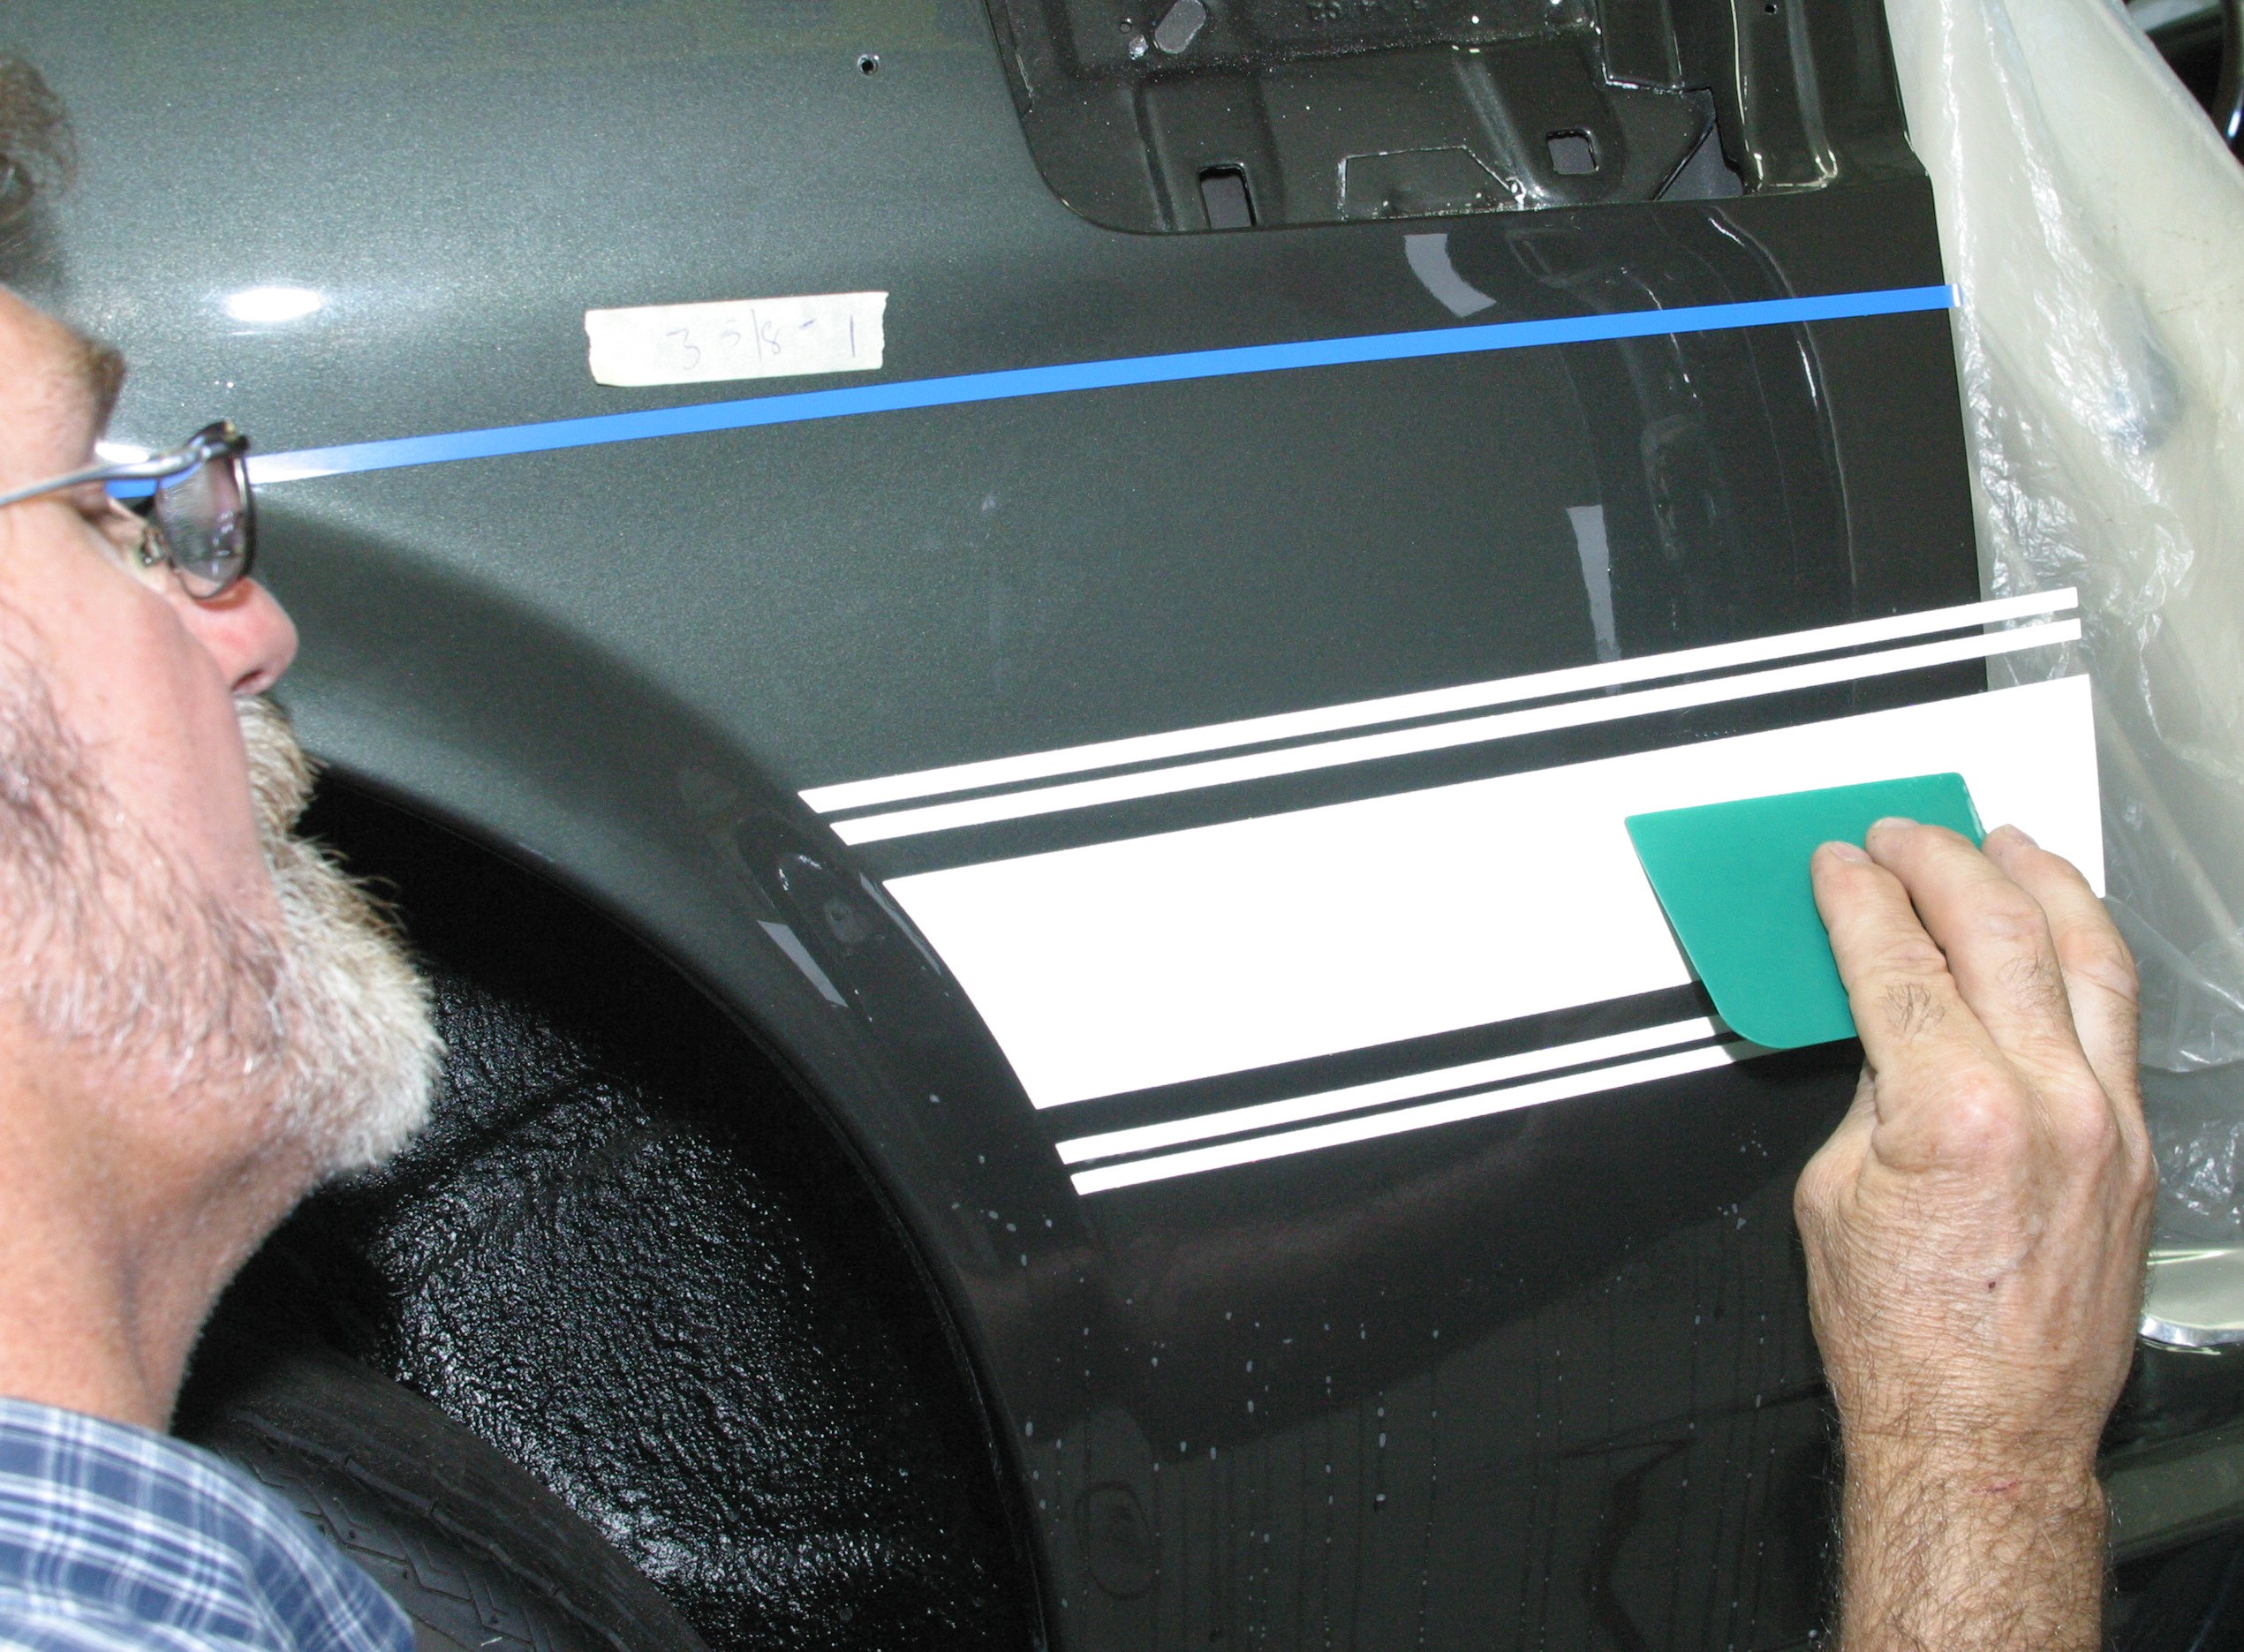
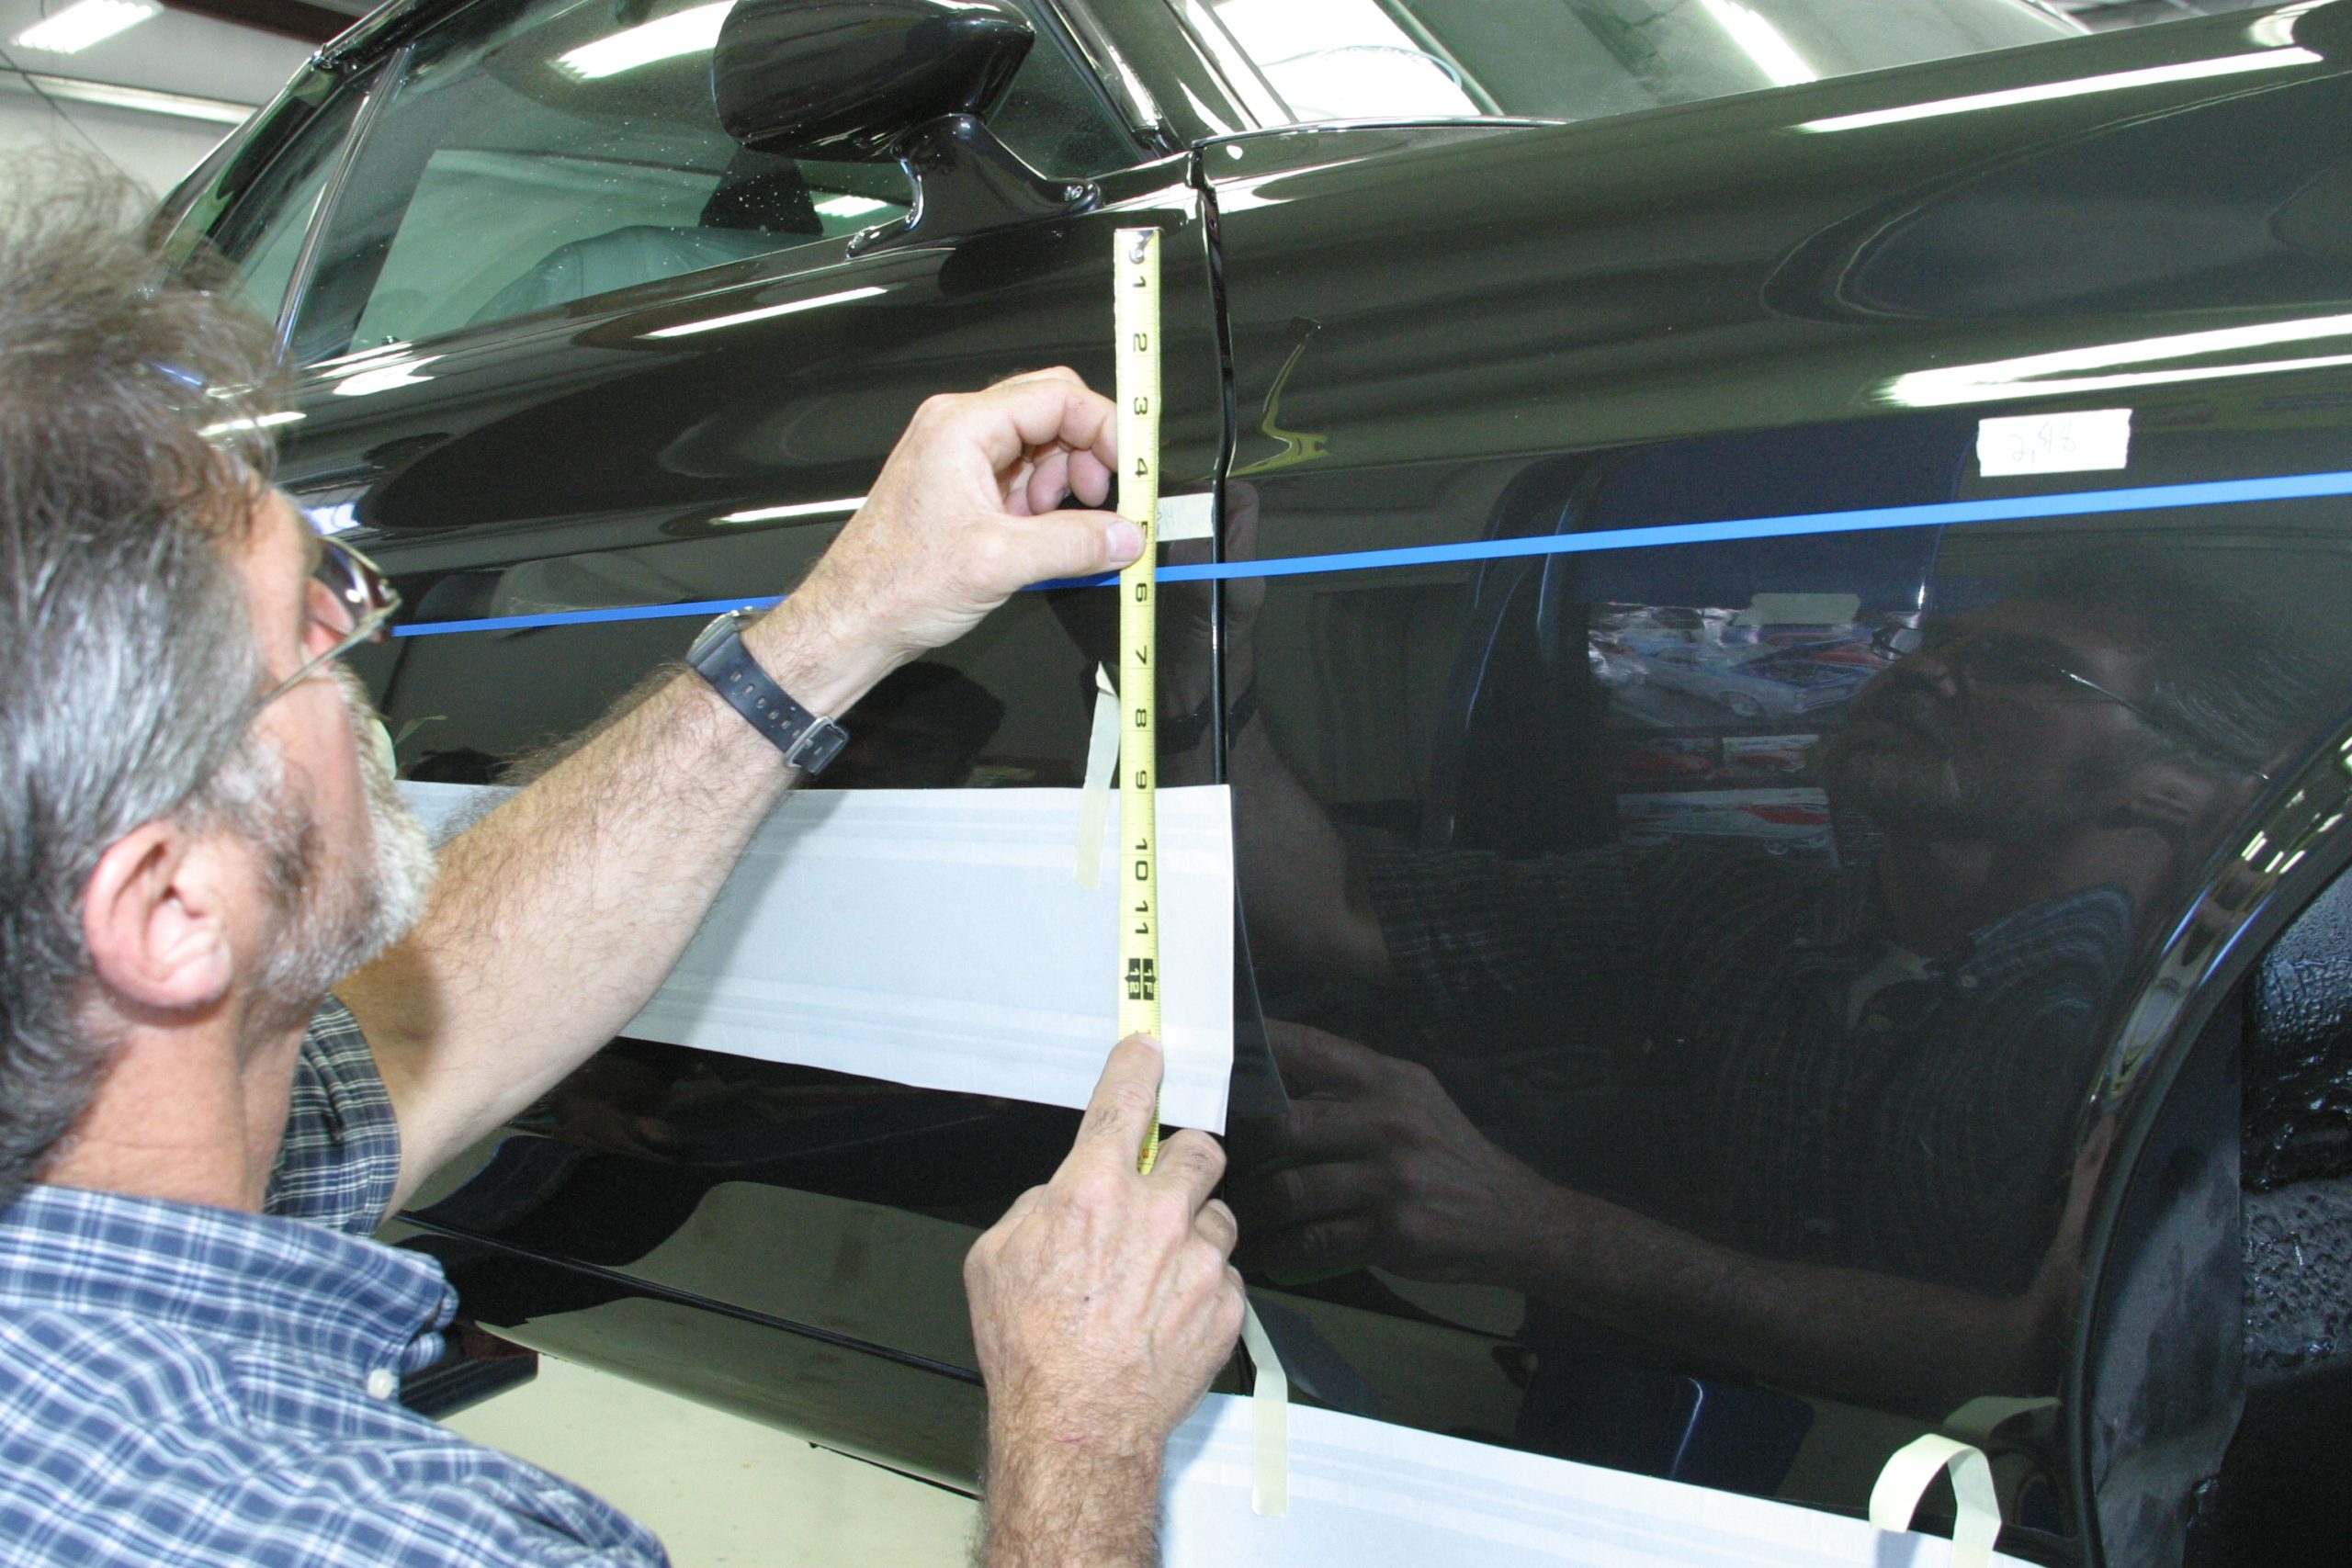
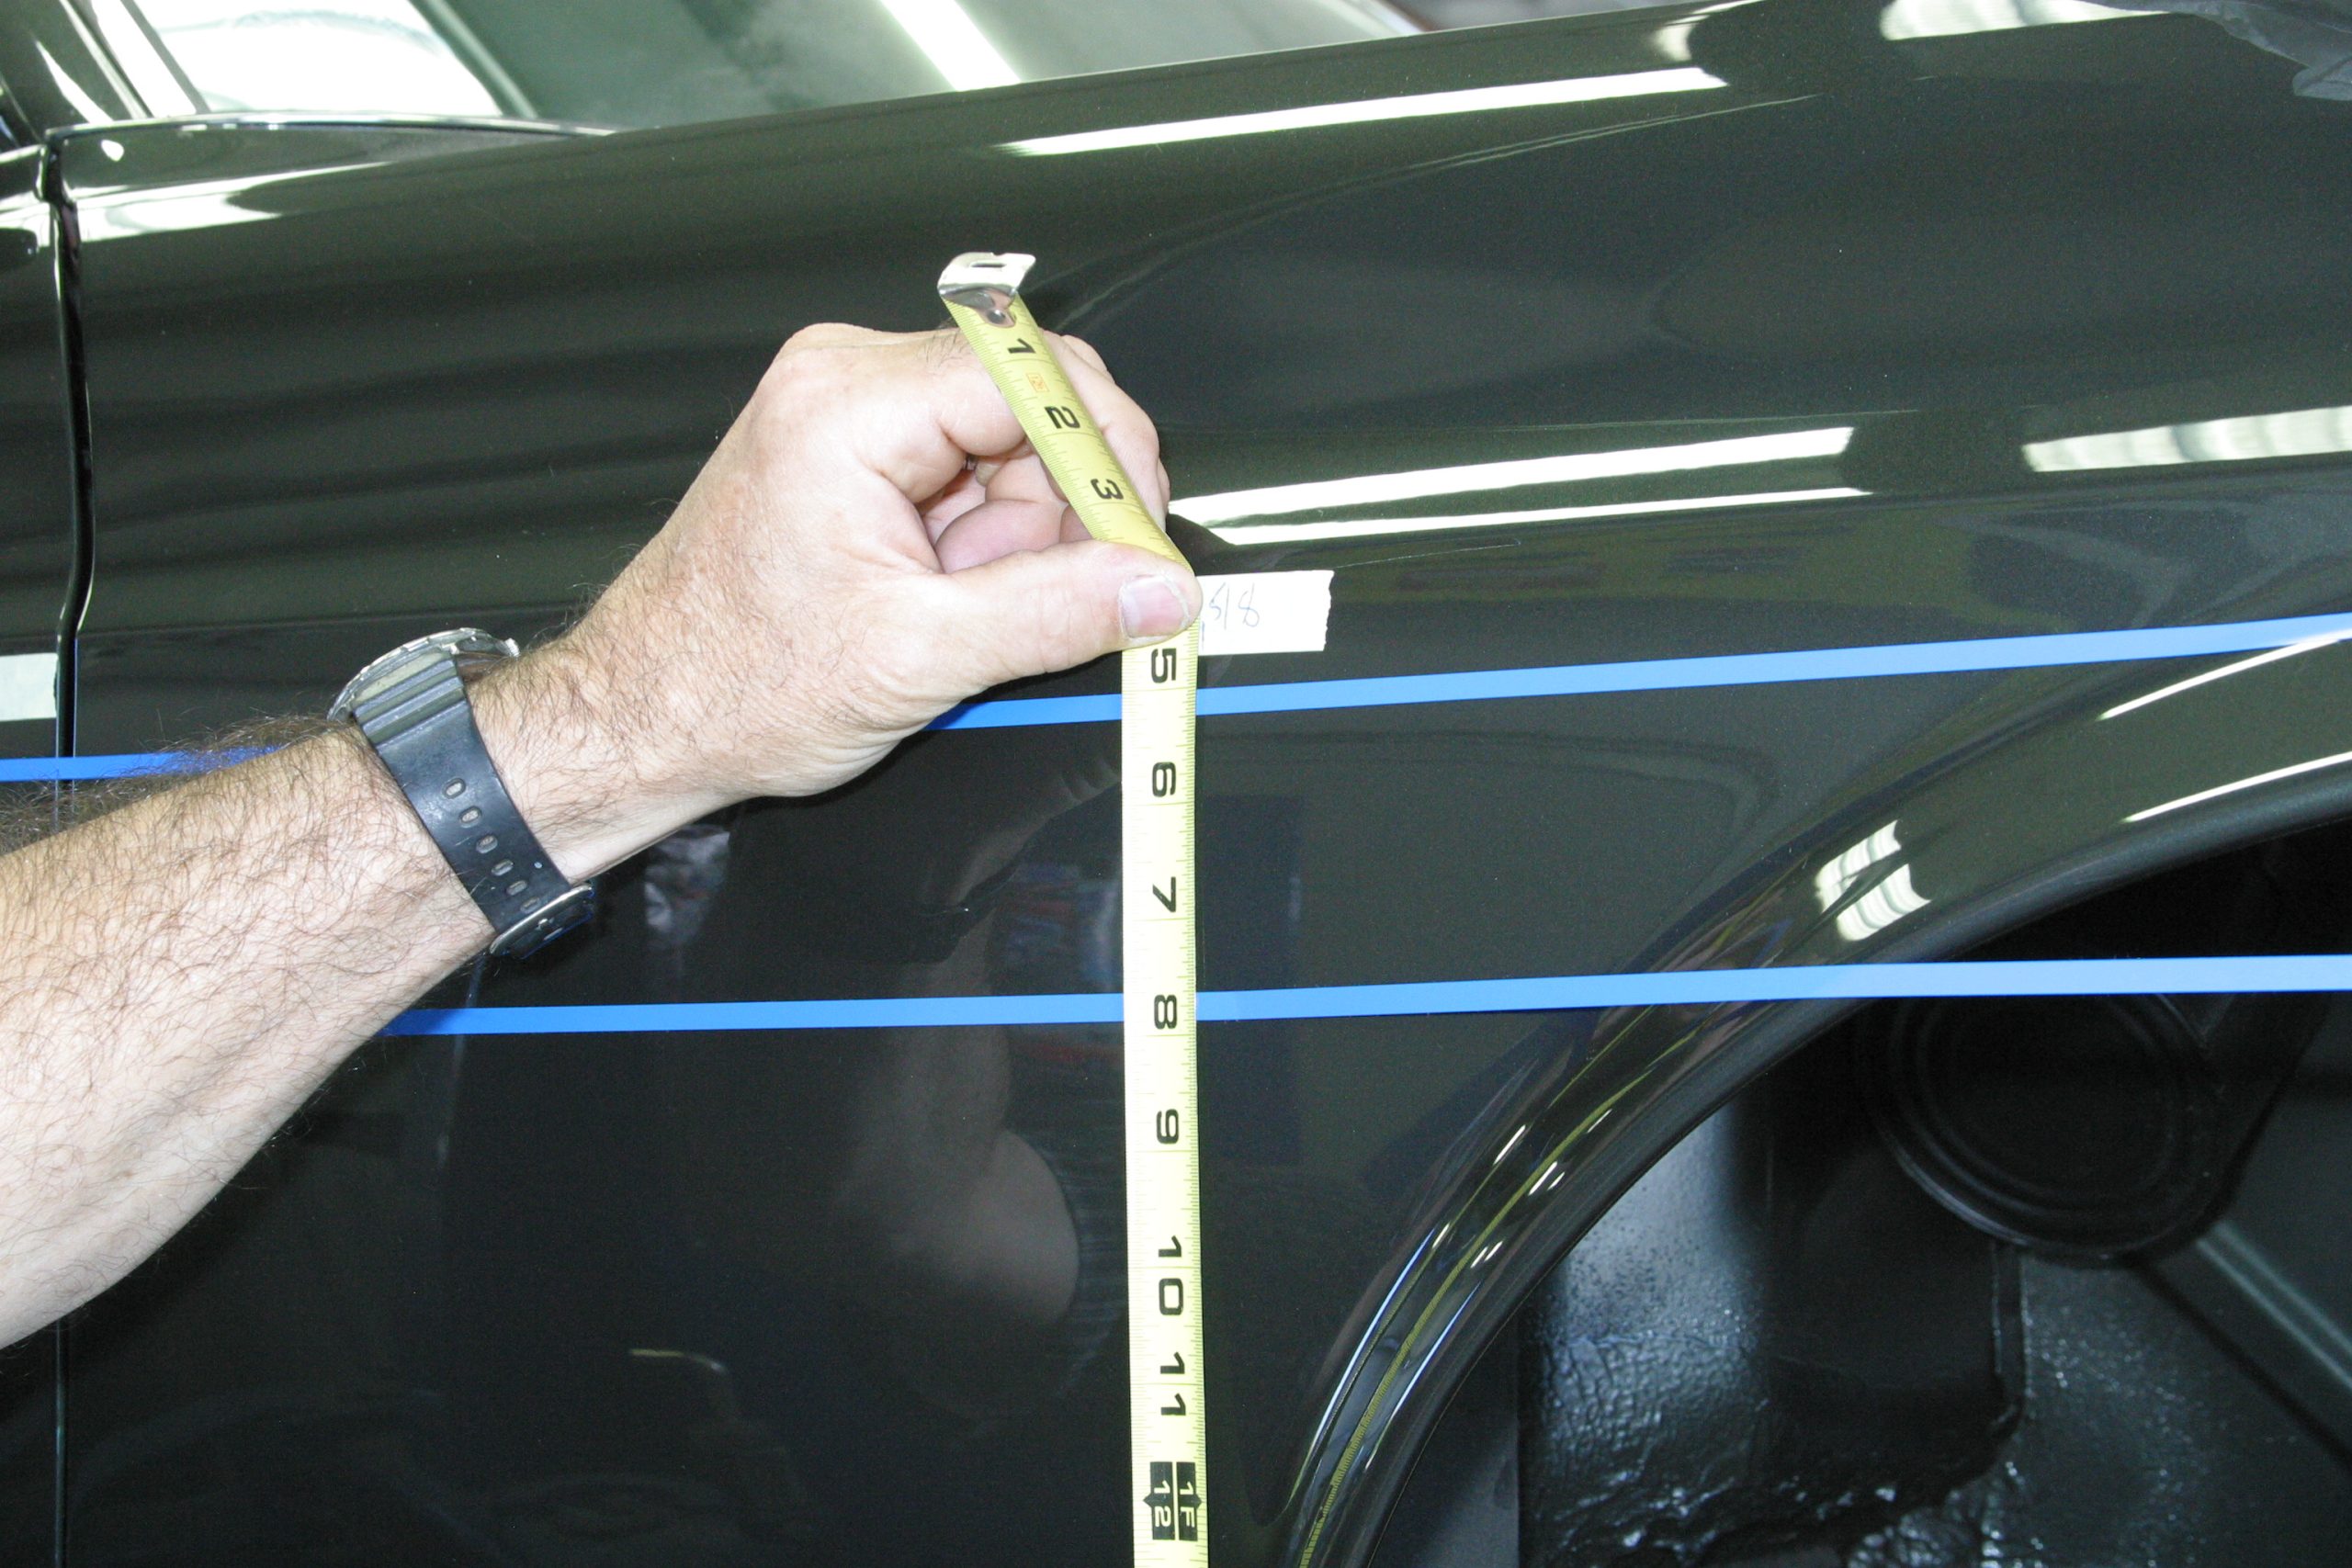
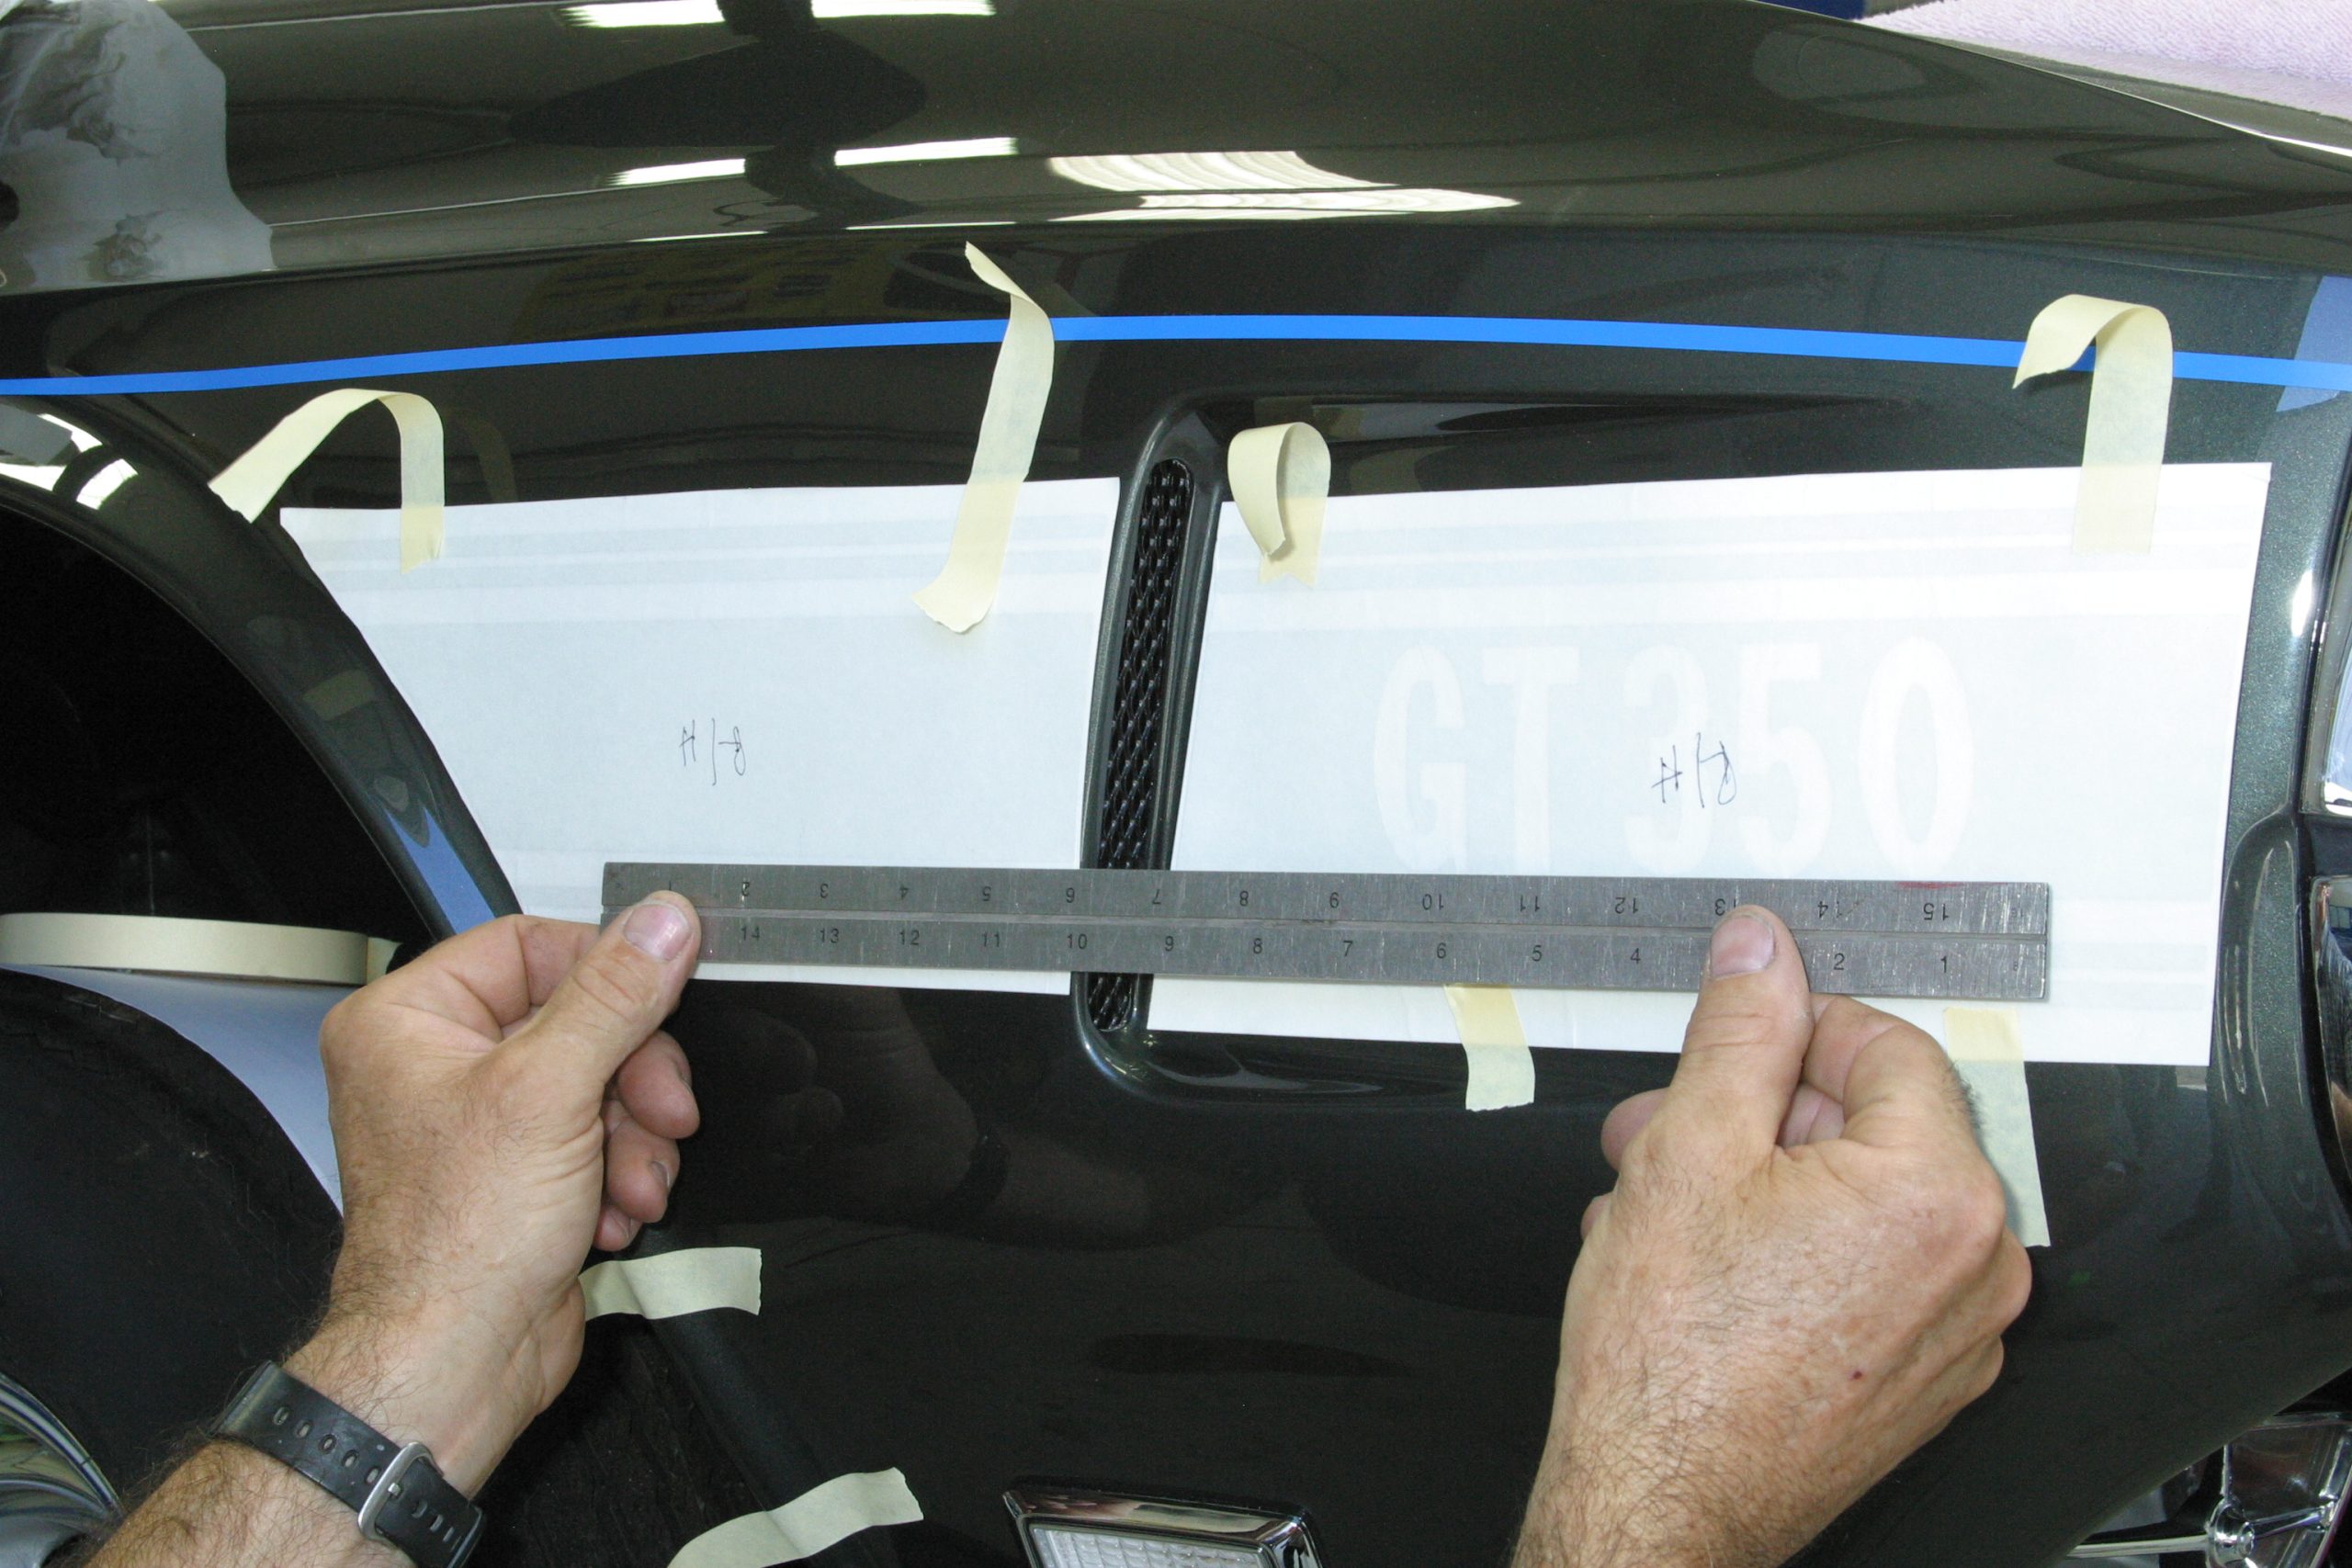
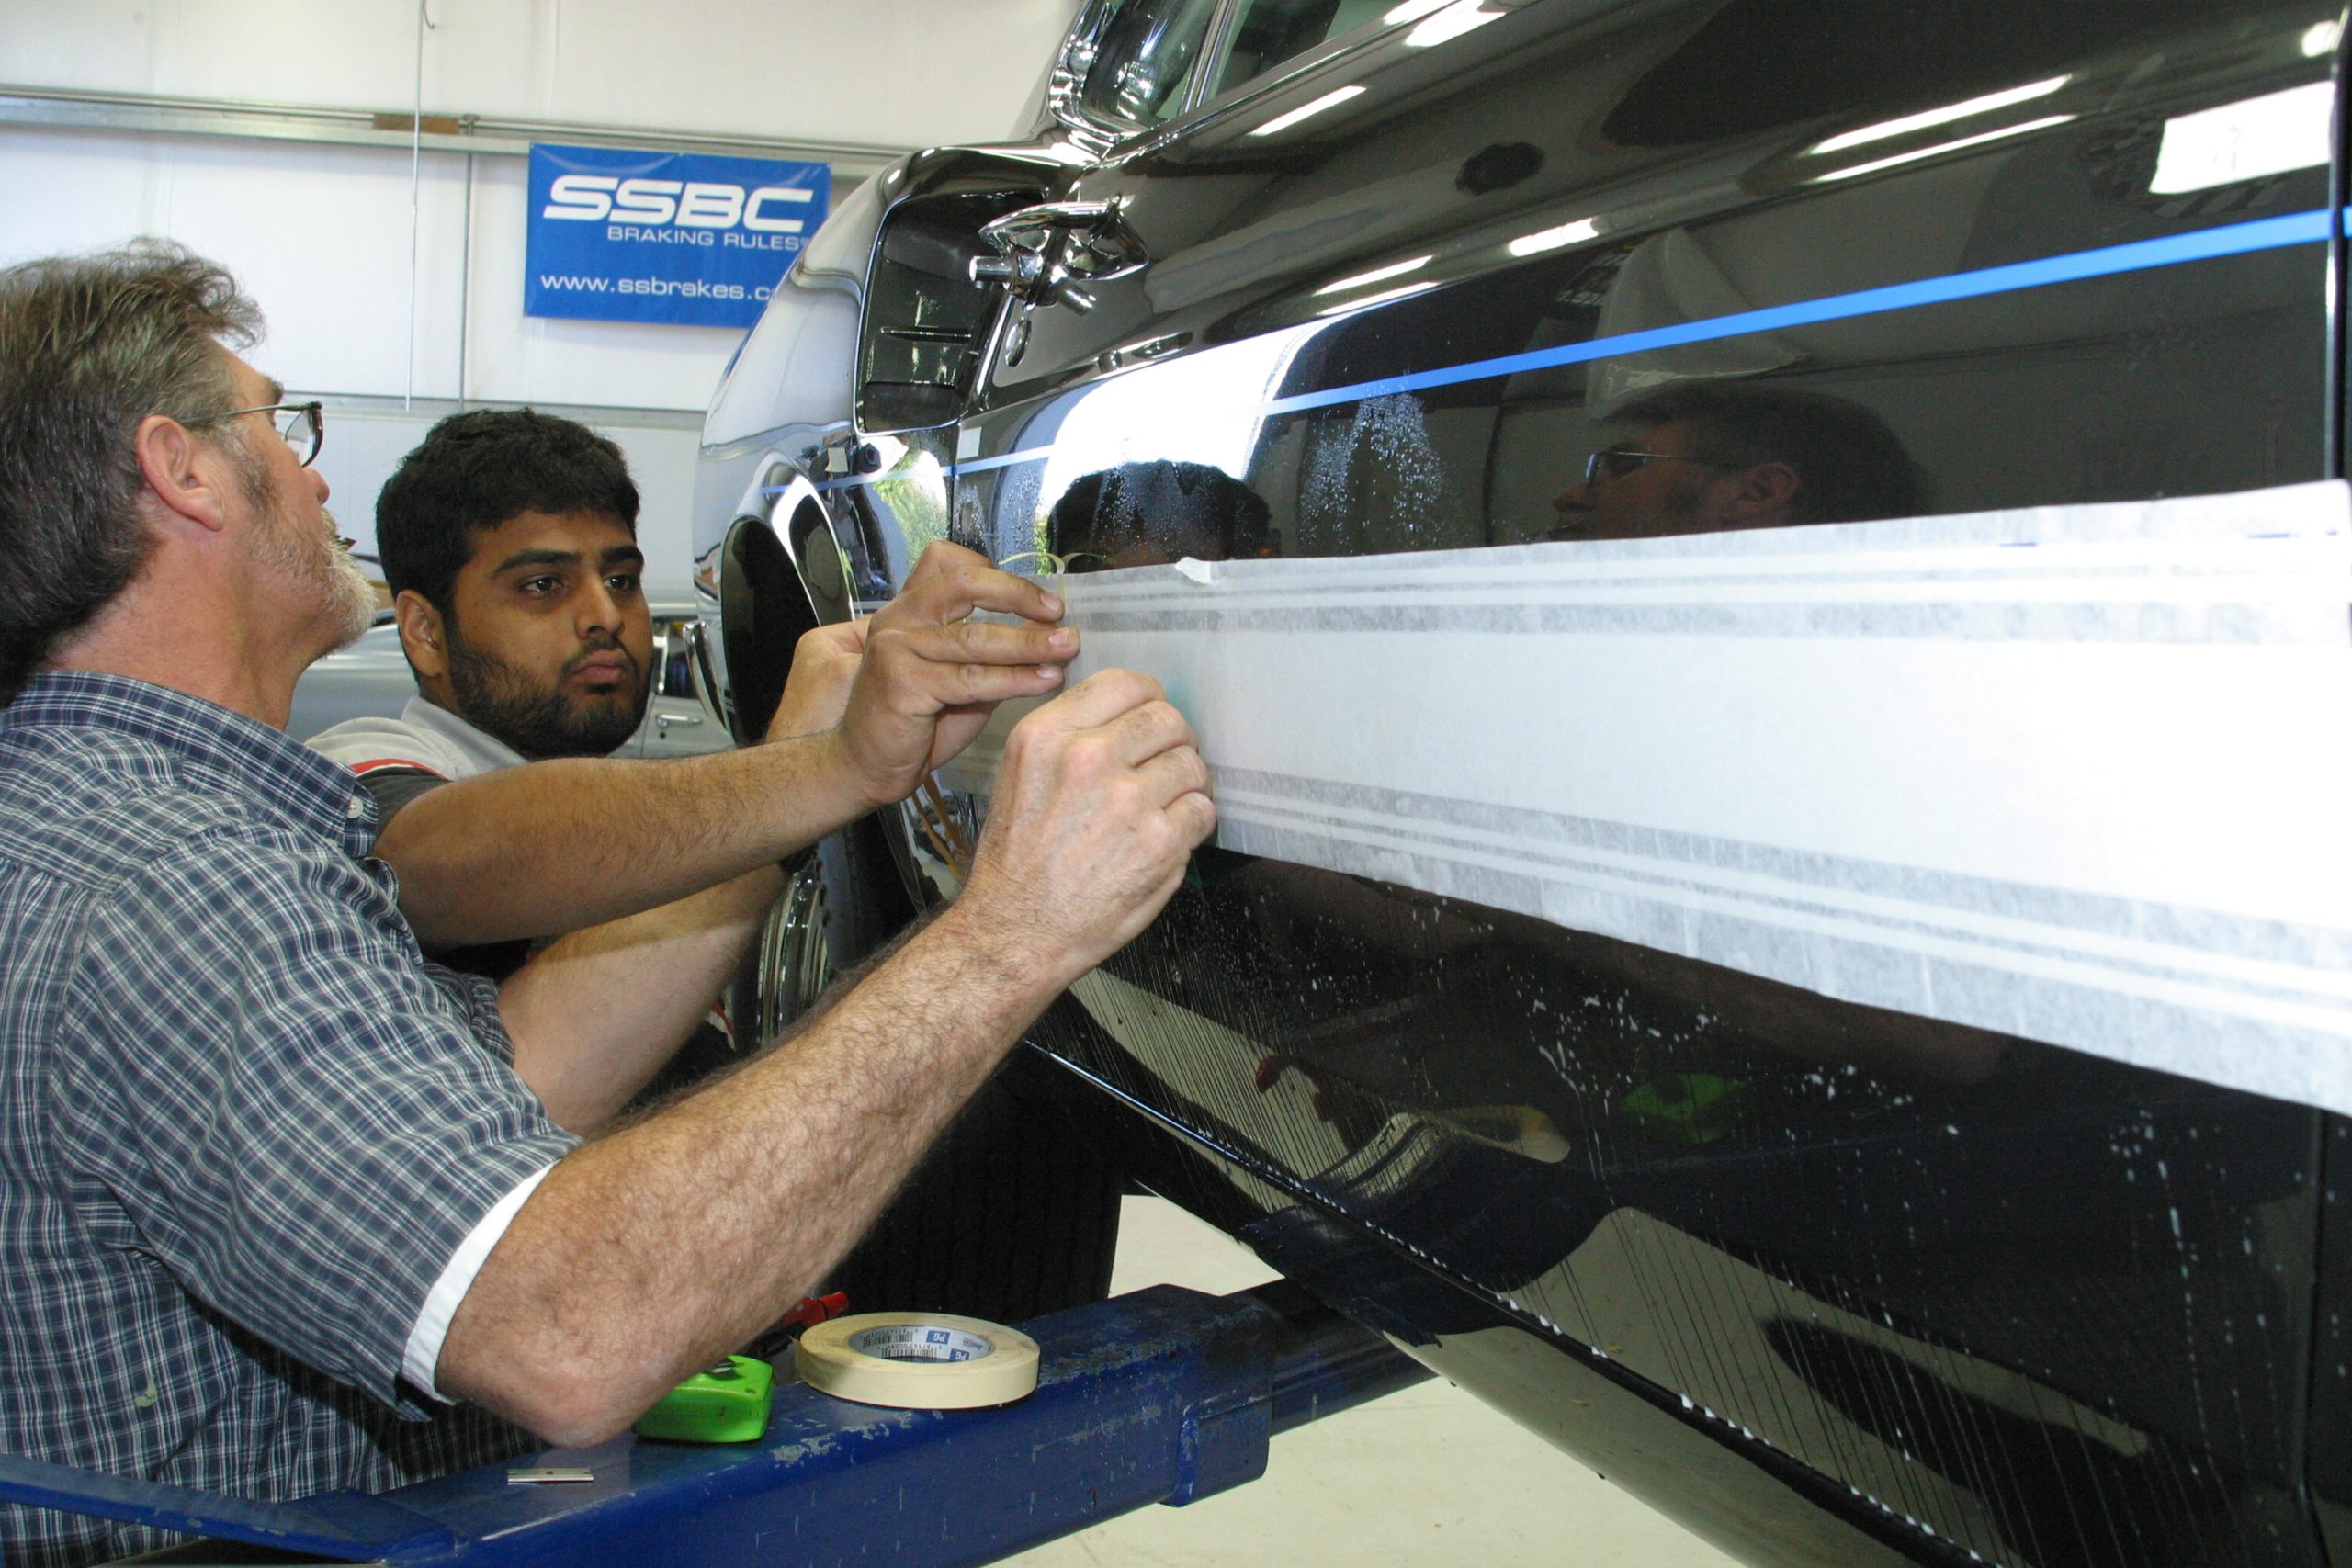
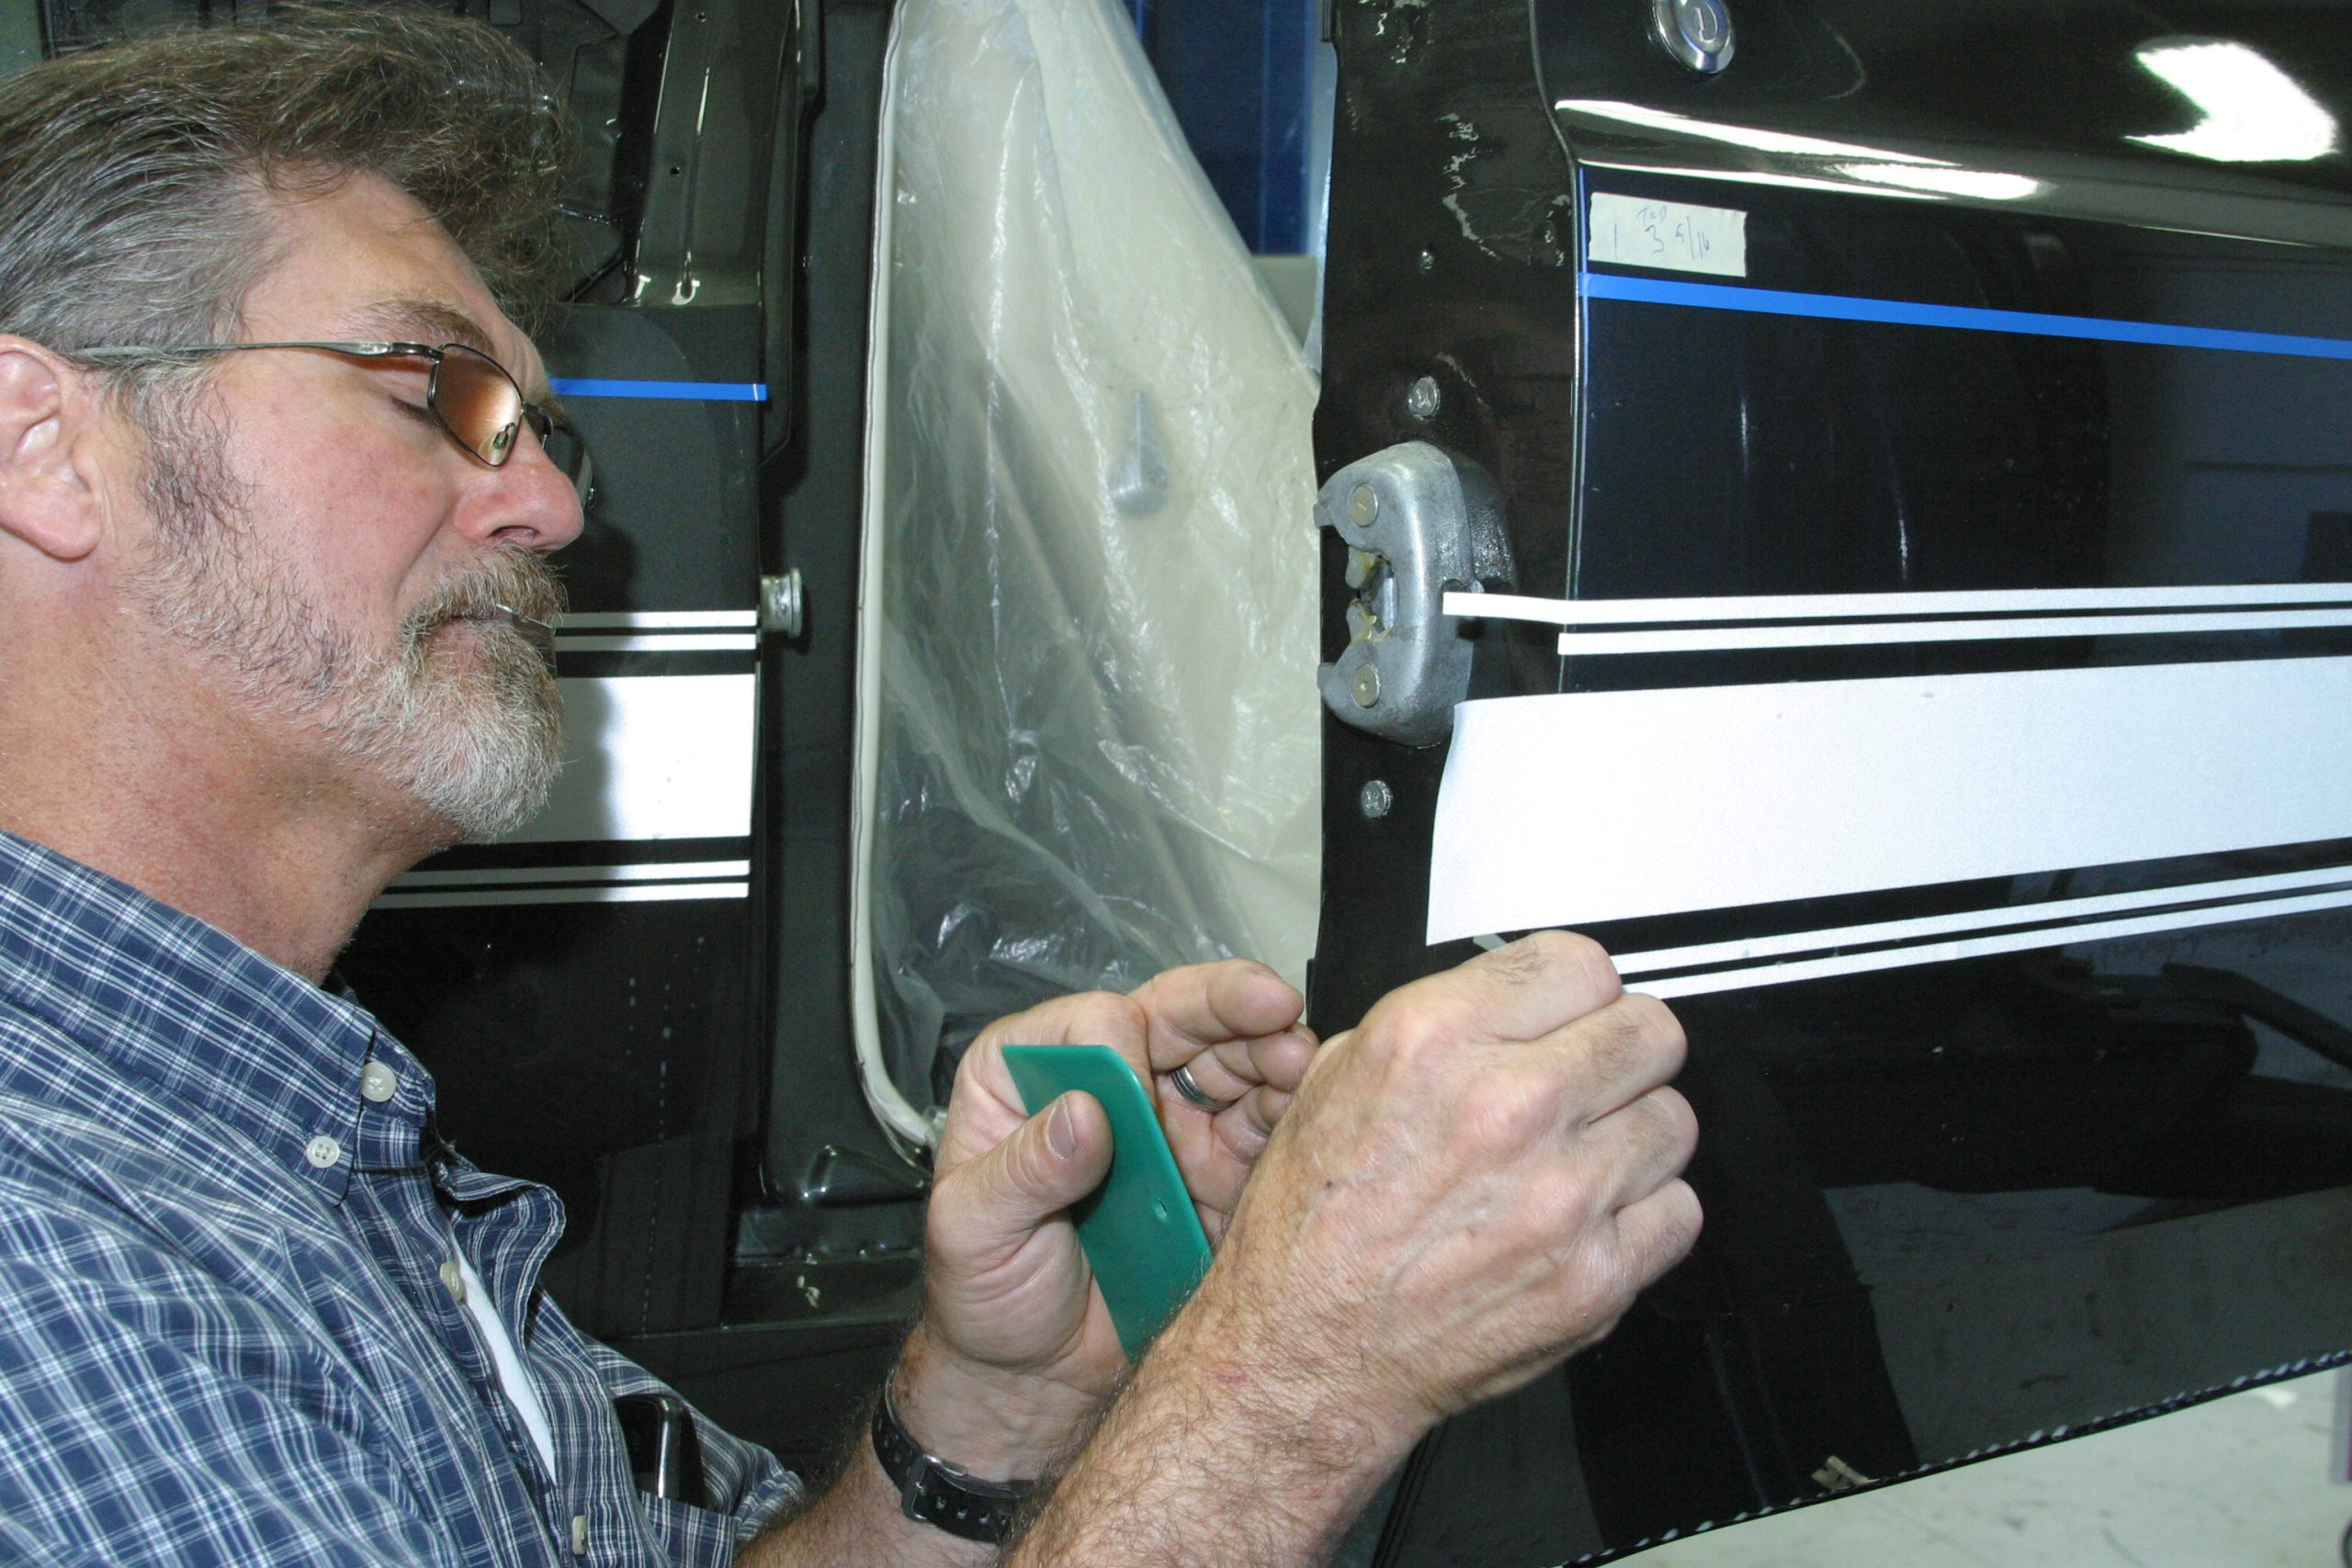
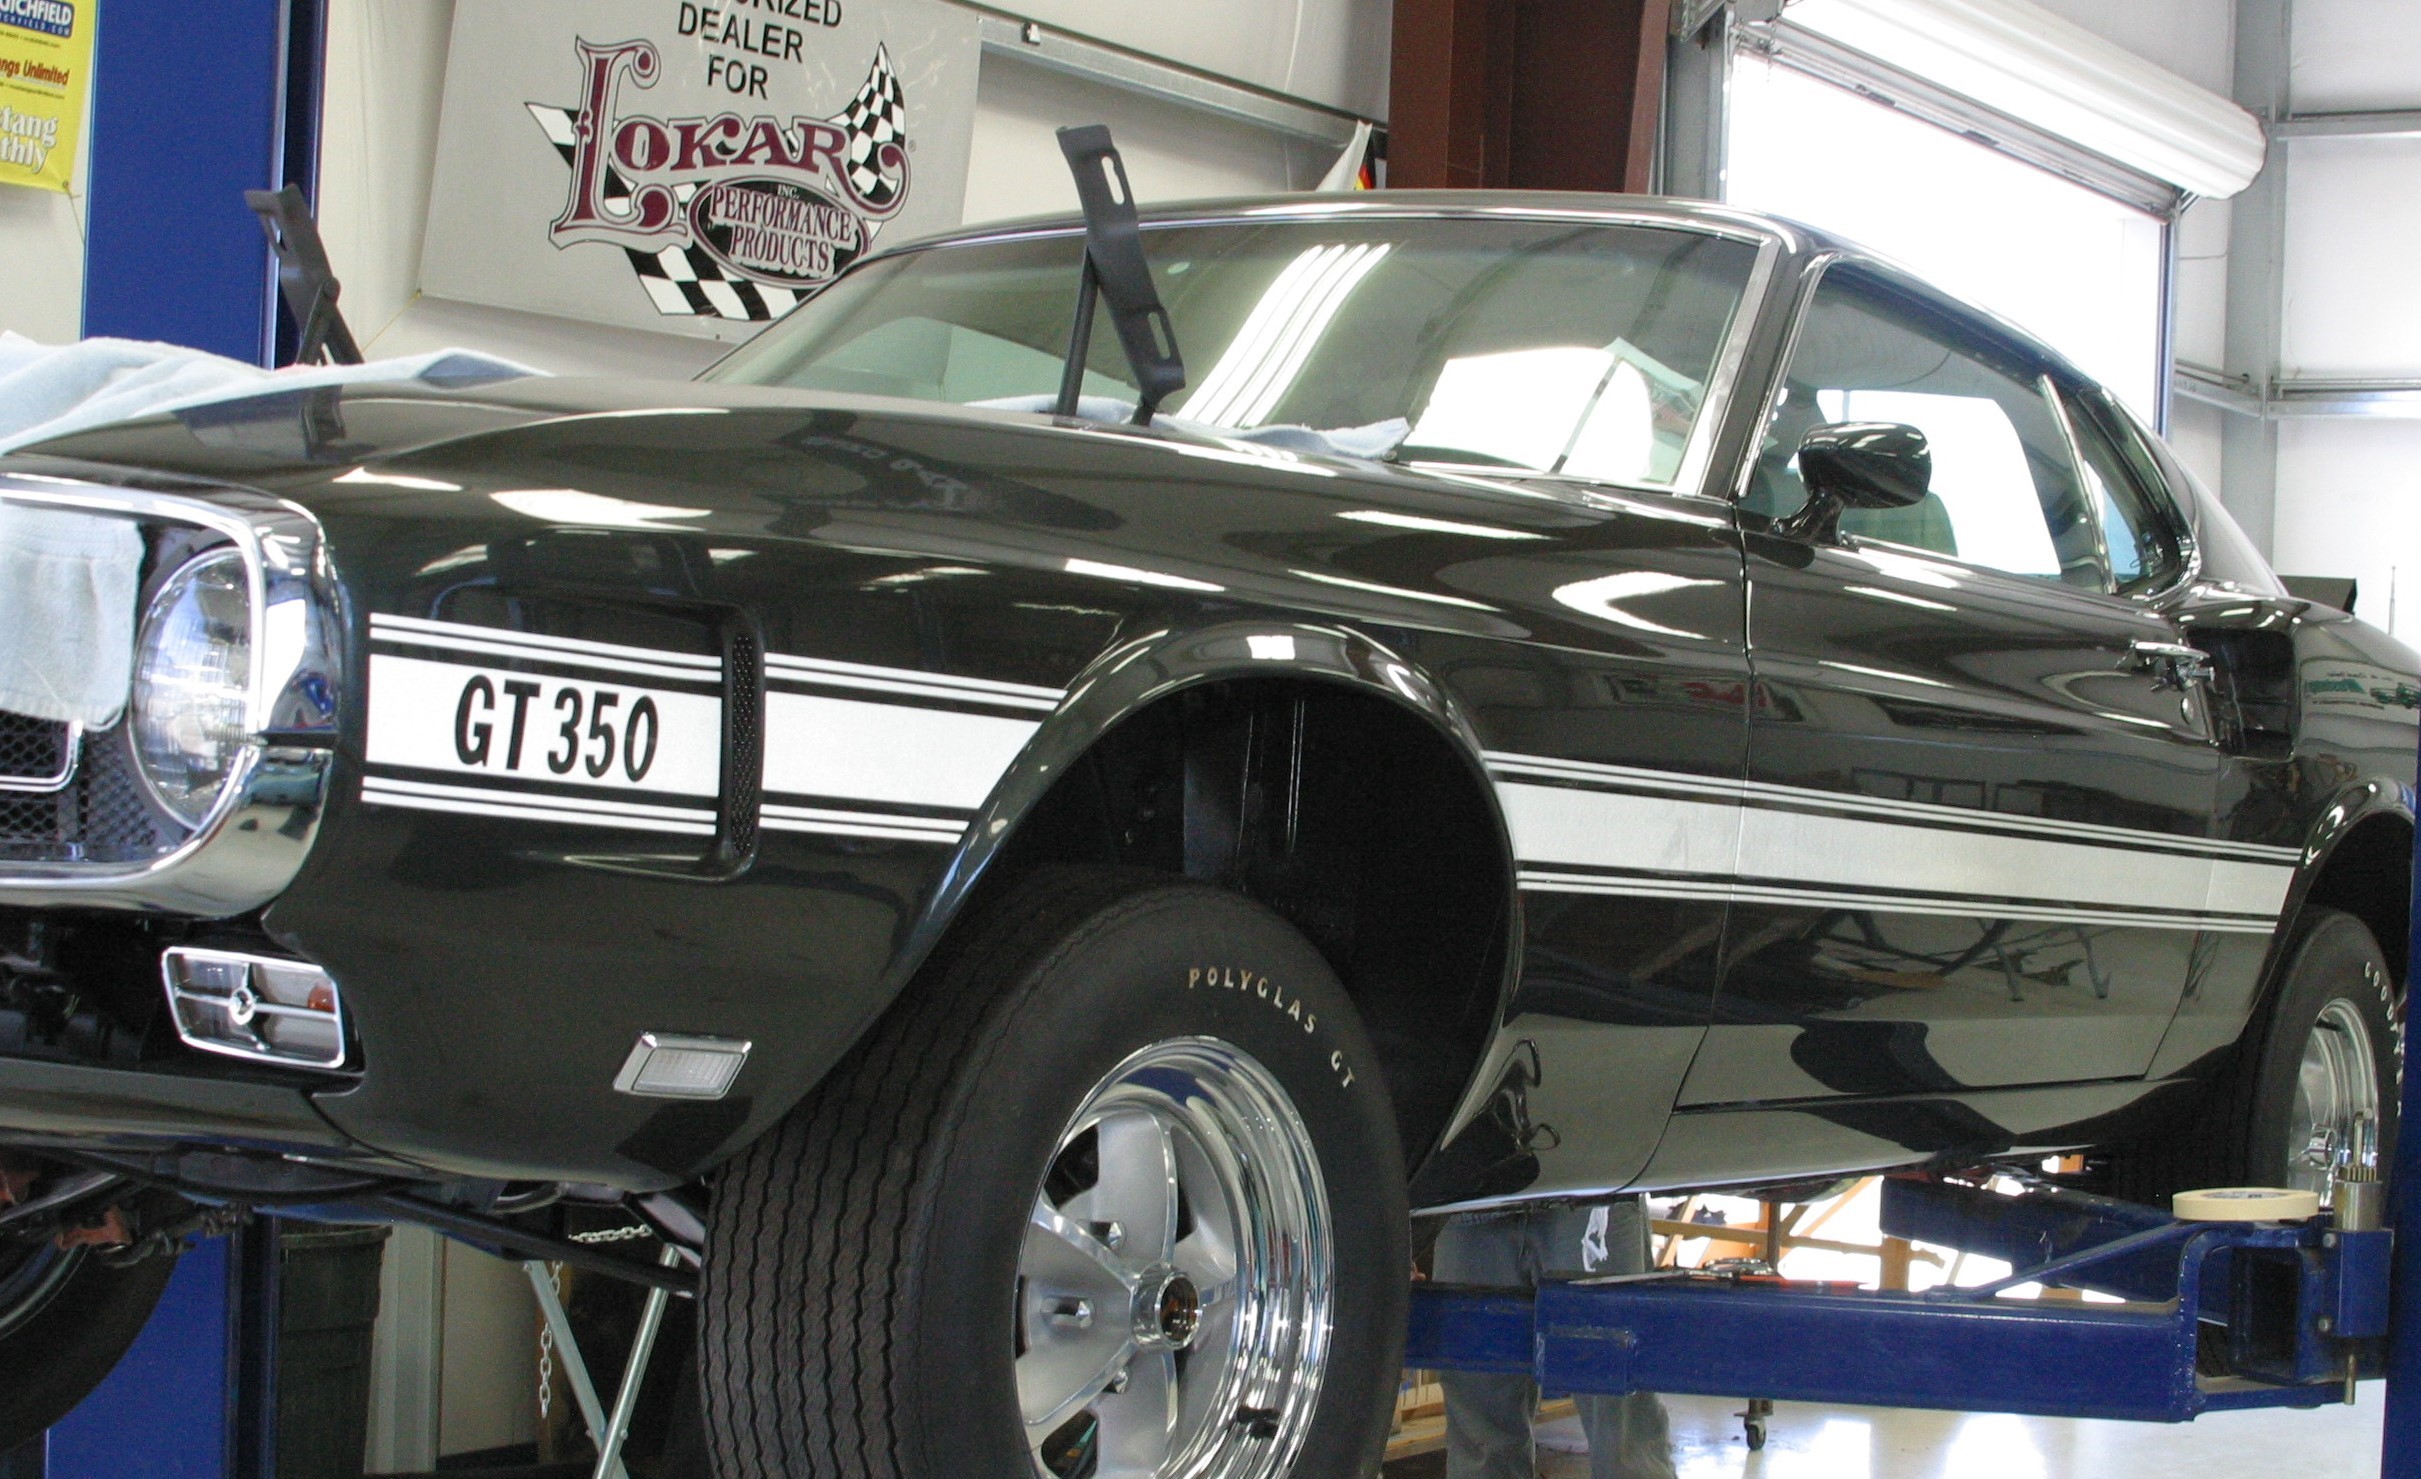
Terry Simpson thoroughly cleans the Shelby’s paint with a surface cleaner for optimum stripe adhesion. Summit Racing™ Surface Cleaner is an excellent choice for the job. It’s a quick-evaporating mild solvent that removes wax, oil, grease, and silicone contaminants from automotive finishes. (Image/Jim Smart)Terry uses 1/4-inch wide masking tape as a guide to ensure stripe installation is spot on. (Image/Jim Smart)Terry begins installation with the rear quarter panel stripe. It acts as a reference point for lining up the remaining graphics. The rear side marker light is outlined in the stripe with a marker and cut with a sharp razor blade. The fender stripes will be done next—the door stripe is last. (Image/Jim Smart)Stripe kits aren’t always trimmed to fit out of the box. It’s better to have some excess than not enough. Terry lays each segment on the panel and outlines where trimming is required. This is definitely a situation where you need to check twice and cut once. (Image/Jim Smart)The rear quarter panel graphics in place. (Image/Jim Smart)Terry lays out tape guides between the quarter panel and the door. This offers accurate stripe alignment from the quarter to the door to the front fender. It helps to have an eye for accuracy. (Image/Jim Smart)Terry lays down the stripe between rear wheelwell and the back edge of the door. Most decal-style graphics have a paper backing on both sides for protection. To install, spray a soapy water solution on the car. Carefully peel off the backing on the adhesive side of the stripe, spray it with the soapy water, and lay it on the car. The water allows you to easily position the graphics. Once the stripe is properly aligned, Terry uses a flat-edged tool to squeeze out the water and any air bubbles underneath. (Image/Jim Smart)The door stripes are temporarily taped in place to determine alignment to the front fender. (Image/Jim Smart)Alignment tape is laid down along the door and the length of the front fender. The proper distance between tape lines is determined by the width of the graphics. Terry writes the dimensions on masking tape marks for reference, a very smart idea. (Image/Jim Smart)The front fender stripes ahead of the wheelwell are temporarily positioned for alignment purposes. Remember, door panel stripes are installed last. (Image/Jim Smart)Terry moves to the door where stripe positioning is referenced to the fender and quarter panel stripes. Even if you’ve checked and rechecked the alignment, having someone putting an extra set of eyes on the project is a good idea, especially with longer stripes like this one. (Image/Jim Smart)This is where the rubber meets the road. With the stripe positioned and the soapy water squeezed out, the backing paper is peeled off. Excess material is trimmed and wrapped around the door’s trailing and leading edges. (Image/Jim Smart)One Shelby GT350 with its stripes. Take it slow, check and double-check alignment and position, and you’ll be rewarded with properly installed, factory-correct graphics. (Image/Jim Smart)
Jim Smart is a veteran automotive journalist, technical editor, and historian with hundreds of how-to and feature articles to his credit. Jim's also an enthusiast, and has owned and restored many classic vehicles, including an impressive mix of vintage Ford Mustangs.

Comments