(Image/Wayne Scraba)
Putting together ignition wires can be troublesome without the right tools.
It wasn’t a big deal when solid core 7-mm wires were the norm, but with today’s selection of large-diameter spiral core wires, things have changed.
You need special tools and procedures to get the job done correctly.
Here’s a brief description of what’s required to assemble spiral core wire sets:
1. The first step is to measure the wire length. If you start with cylinder number one in the firing order, copy that wire and replace it, then continue around the firing order, you won’t get mixed up. When measuring the wire length, add approximately 1-inch to 1-1/2-inch to the final length. This makes up for the wire stripping action. By the way, cutting spirally wound wire is simple: Either use a set of sharp snips or a dedicated stripping/crimping tool—one clean snip and it’s over. Next, slide approximately 1/2- to 3/4-inch of the wire end through the stripping tool (included with many wire sets). Rotate the stripping tool clockwise, with the blade facing you. This cuts the wire to the exact depth. Next, pull the stripper back toward you. The insulation should come off easily, without damage to the spiral winding.
2. Fold the stripped conductor back onto the wire jacket. Then place the wire terminal directly over the conductor. Take your time doing this. There is a chance you can deform the wire spiral or the fiber core. Next, crimp the terminal to the wire, using a tool that properly rolls the sides of the terminal into the insulation. The stripped-away wire should be positioned inside the U-shaped portion of the terminal. This provides a stronger grip and ensures maximum electrical contact.
3. Push the boot back over the wire after it has been stripped. WD40 can be used as a lubricant, but dielectric grease works even better. You can also use a small amount of dish soap and water to prevent the boot from freezing on the silicone wire jacket. This allows the boot to easily glide back and forth on the wire—and that’s something you’ll appreciate when assembling the wires.
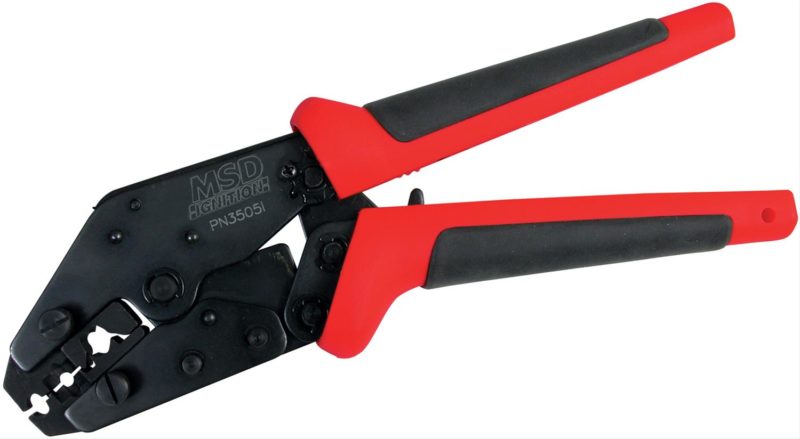
Everything is straightforward, but the catch in the above is the crimp part of the equation. The downside to today’s latest spiral wound suppression wires is the aggravation of properly terminating the wire and crimping the ends. There are any numbers of tools available to accomplish this task, but we’ve developed a definite fondness for modern ratchet style crimpers. They’re typically a beefy steel piece that isn’t plagued with handle flex. In the case of the first generation MSD tool shown in the photos, the main frame is built from hardened steel, and incorporates comfortable molded handgrips. Just as important, it’s engineered to painlessly crimp today’s spiral wound ignition wire.
There are several different types of interchangeable jaws optionally available for stripping and crimping with the MSD tool, for example assembling troublesome Weatherpack connectors (you simply swap the jaws for the type of work you’re doing). The best part, however, is that it does the job of crimping wire by way of a ratchet action that provides secure, factory-style crimps. In simple terms, once you’ve lined up the respective pieces and squeeze down on the handles, you’re guaranteed a perfect crimp. The bottom line is, there’s no guesswork.
One note of caution: With any of the ratcheting crimpers, be certain to keep your fingers or any other body parts clear of the jaws when crimping. The way they work, you continue to squeeze the ratcheting handles until the crimp is complete. Then they release. If you accidently encounter a ‘pinch,’ there is a little release mechanism contained within the handle of the tool. If you’re in the middle of a crimp and you need to release the jaws, push the little release level forward.
This isn’t the only crimping tool available. We actually have several in our toolbox—two others that are less costly and don’t use a ratcheting jaw format. Additionally, MSD and others have actually improved upon the ratchet style crimpers.
More on crimpers in the accompanying photos:

Mini-stripper crimpers allow you to create your own custom spark plug wires. They provide a “die” to strip either 8mm or 8.5mm wires, and can then be used in a vise to provide a solid terminal crimp to the wire. This is an inexpensive way to make a set of custom spark plug wires. FYI, this type of crimper is included with many different ignition wire sets. (Image/Summit Racing)

Here’s the original MSD Pro Crimp tool we mentioned in the text. It’s a sweetheart tool that makes perfect crimps every time. Today, it has been superseded by the next tool… (Image/Wayne Scraba)

The original MSD Pro-Crimp tool is a race shop favorite, but even a great design can be made better. The new and improved Pro-Crimp tool delivers the same repeatable crimps that you expect but with an improved chassis. The hardened steel frame features streamlined handgrips with improved leverage to ease the crimp effort. The handles also feature a slip-free grip design when working with the tool. The Pro Crimp tool is supplied with crimping/stripping dies for MSD dual crimp spark plug wire terminals. (Image/Summit Racing)

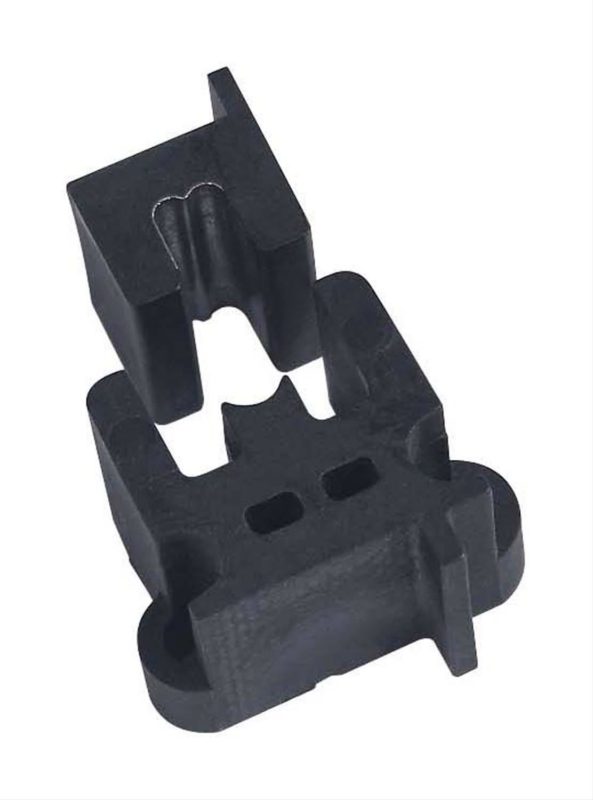
This is one of the optional dies for the MSD crimping tool. The available dies can be used to crimp weather pack connectors, Deutsch terminals, Amp Lug terminals and Amp Pin terminals. (Image/Wayne Scraba)

The dies are replaced by removing the knurled retaining screws on the ratchet tool jaws. They’re incredibly easy to remove and replace. (Image/Wayne Scraba)

The pointer shows the little release mechanism we mentioned that is located on the ratchet tool handle. Push forward to release the tool jaws. This is a real pain saver if you somehow get your skin caught in the tool! (Image/Wayne Scraba)

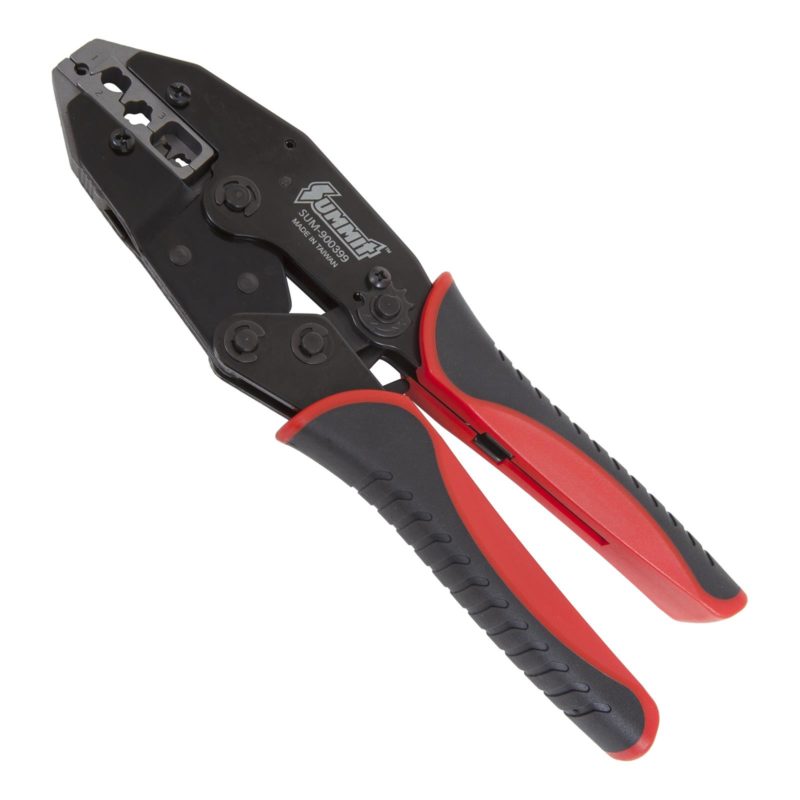
Summit Racing’s own ratcheting crimp tools are designed with an adjustable crimping compression mechanism to help produce a consistent, factory-style crimp each and every time. The tool also feature steel jaws with a black oxide finish and easy-to-grip handles for comfortable use. (Image/Summit Racing)

This is a Moroso general-purpose wire-crimping tool. It’s designed for cutting and crimping spark plug terminals along with other automotive standard wire hardware. They will also work on 10-18 gauge wire sizes. (Image/Wayne Scraba)

Here’s an older MSD crimper we have in our tool collection. While no longer available, there are plenty of similar examples out there. These tools are capable of cutting wire and stripping it too. (Image/Wayne Scraba)

I am looking for a new crimping tool for crimps work. I want to know what to consider when I will buy it. By the way, thanks for sharing a nice post. Keep up more share.